API V2 Legacy Documentation
This is documentation for older version of Telestream Cloud API. We will maintain to ensure backwards compatibility but we strongly ecourage you to switch to new API V3.0 to stay up to date with Telestream Cloud development.
General
Getting started with Telestream Cloud
At the core of Telestream Cloud is a REST API which supports uploading and managing of videos, encodings and output profiles.
Every Telestream Cloud account has a number of clouds. Each cloud defines a single storage for your uploaded videos, resulting encodings and thumbnails.
Typically you will want to create a separate cloud for each website you plan to integrate Telestream Cloud into. You can also use clouds to separate production and staging environments.
To access the API there are client libraries available in many languages: See all client libraries. Refer to the API Docs when using the API. All API responses are JSON-formatted.
The following guides are also available: Rails How-to and PHP How-to.
Telestream Cloud provides two ways of sending video files in for transcoding. The first is by using the url of a video anywhere on the web (see API Docs for details). The other method is by using our excellent Javascript uploader which supports seamless HTML5 and Flash uploads, automatically detected depending on the client’s browser.
To configure the encoding output formats, refer to the Encoding Presets documentation.
Feedback
Whether you feel that this article is incorrect, outdated or missing information, don’t hesitate to contact the support.
Libraries
Client Libraries
Officially supported libraries
- Client gem for Ruby (Download .zip)
- Client for PHP (Download .zip)
- Client for Python (Download .zip)
- Client for NodeJS (Download .zip)
- Drupal module (Download .zip)
Sample applications
Gets you started rapidly. Or just to take a look at how we have done things.
- Sample Ruby on Rails app (Download .zip)
- Sample PHP app (Download .zip)
- Sample Django app (Download .zip)
Contributions
- Client for Go by Jack A Argirov
- Client for .NET by Mark Bonano (Download .zip)
- Client for Java by Max Hille (Download .zip)
- Client for ColdFusion by Anuj Gakhar
- Client for ColdFusion by Steve Santana (Download .zip)
- Panda-Putter: command-line video upload tool by Matthew Savage
- PandaEE: Expression Engine module by Atcore Systems
- Client for PHP by Christian Flothmann
- Bundle for Symfony2 Christian Flothmann
Built a library for another language? Let us know!
API
This document outlines the V2 of the HTTP interface that Telestream Cloud exposes to other applications.
Client initialization
#!/usr/bin/env python
# -*- coding: utf-8 -*-

from python import Panda
from pprint import pprint

panda = Panda(
    api_host = "api-eu.pandastream.com",
    api_port = "443",
    cloud_id = "2297c22da25dd3ce3ea64513eda642be",
    access_key = "80a91c7b8d1adeaf25b1",
    secret_key = "c92dbf4065badf0ca9c4",
)
#!/usr/bin/env ruby
# encoding: UTF-8

require 'panda'
require 'pp'

Panda.configure do
  api_host "api-eu.pandastream.com"
  api_port "443"
  cloud_id "2297c22da25dd3ce3ea64513eda642be"
  access_key "80a91c7b8d1adeaf25b1"
  secret_key "c92dbf4065badf0ca9c4"
end
package main

import panda "github.com/pandastream/go-panda"

func main() {
  manager := panda.Manager{
      &panda.Client{
          Host: panda.HostGCE,
          Options: &panda.ClientOptions{
              AccessKey: "access_key",
              SecretKey: "secret_key",
              CloudID:   "cloud_id",
          },
      },
  }
}
A successful communication with Telestream Cloud requires a set of credential parameters:
api_hostapi_portcloud_idaccess_keysecret_key
The access_key and secret_key used to authenticate the request are provided when you sign up for your Telestream Cloud account. Your keys can always be found by logging in to your account by visiting pandastream.com. After logging in you can browse your clouds and find out their unique indetificators, cloud_id-s.
An api_host is one of three API end-points:
- For AWS US customers: api.pandastream.com
- For AWS EU customers: api-eu.pandastream.com
- For Google Compute Us customers: api-gce.pandastream.com
You’d usually want to have 443 as a value of api_port, to indicate that you want to connect using SSH authentication protocol, but it’s also possible to connect to Telestream Cloud using basic HTTP and port 80.
API authentication
Example request
from pprint import pprint

pprint(panda.signed_params('GET', '/videos.json', {'some_params': 'some_value'}))
require 'pp'

PP.pp(Panda.signed_params('GET', '/videos.json', {'some_params' => 'some_value'}))
client := &panda.Client{
          Host: panda.HostGCE,
          Options: &panda.ClientOptions{
              AccessKey: "access_key",
              SecretKey: "secret_key",
              CloudID:   "cloud_id",
          },
      }
var params url.Values{}
if err := cl.SignParams("GET", "/videos.json", params); err != nil {
  panic(err)
}
Example response
{'access_key': '80a91c7b8d1adeaf25b1',
 'cloud_id': '2297c22da25dd3ce3ea64513eda642be',
 'signature': 'y9cMGDkUNLtucS/fKa7EISvGeThot6h2sLgJKq9jkEg=',
 'some_params': 'some_value',
 'timestamp': '2015-04-29T13:06:36.594402+00:00'}
{"some_params"=>"some_value",
 "cloud_id"=>"2297c22da25dd3ce3ea64513eda642be",
 "access_key"=>"80a91c7b8d1adeaf25b1",
 "timestamp"=>"2015-04-29T13:15:56.453740Z",
 "signature"=>"Vv4wsNVF038GRn/ON21v+tbYJ3/WY6r8L3rt92gX5qY="}
params = url.Values{
  "access_key": {"d24f44a7cee7c47c9f66"},
  "cloud_id":   {"3037dff38de0b77c641f2243bbdafe87"},
  "timestamp":  {"2015-06-08T14:01:20.862018914Z"},
  "signature":  {"a6aLsyXwlyvOOVtn3wISqdc2LR+orXrNC9RVmQ4qpBw="},
}
The Telestream Cloud API requires all requests must also be signed to ensure they are valid and authenticated. For GET and DELETE requests the additional parameters must be url encoded and added to the parameters in the url. When making a POST or PUT request they should be included in the usual parameters payload submitted.
A correctly signed request contains the following additional parameters:
| parameters | attributes |
|---|---|
| access_key | Provided when you sign up for Telestream Cloud |
| cloud_id | Provided when you sign up for Telestream Cloud |
| timestamp | Current UTC time in iso8601 format |
| signature | HMAC signature generated as described below |
You usually doesn’t have to worry about it, since building a valid signature is done transparently by the client libraries. These libraries also provide methods that allows you to generate valid sets of values for provided parameters.
Building the signature
Instead of relying on libraries capabilities to generate valid signatures for Telestream Cloud requests you can easily generate one yourself using basic cryptographic functions. This is useful for example if you’re planning to write and use your own version of communication library using your favorite programming language.
The signature is generated using the following method:
Create a
canonical_querystringby url encoding all of the parameters and the values, and joining them into one string using the=character to separate keys and their values, and the&character to separate the key value pairs.All parameters and values have to be joined in the alphabetical order.
Make sure it encodes the given string according to » RFC 3986. (spaces are escaped using
%20and not a+)A typical
canonical_querystringmight look as follows:access_key=85f8dbe6-b998-11de-82e1-001ec2b5c0e1&cloud_id=bd54547d152e91104d82c0a81e7d5ff2×tamp=2009-10-15T15%3A38%3A42%2B01%3A00… other parameters such as those in the POST request would also be added to this string.Construct the
string_to_signby concatenating the uppercase HTTP request method (GET, POST, PUT or DELETE), hostname (api.pandastream.com or api-eu.pandastream.com), request uri (e.g. /videos.json) andcanonical_querystringwith newlines (\n).The api version
/v2should not be part of the request uriTo generate the
signature, first HMAC SHA256 encode the completestring_to_signusing yoursecret_keyas the key. For example, using Ruby:hmac = HMAC::SHA256.new(secret_key)thenhmac.update(string_to_sign)Then take the binary digest of the hmac output and base 64 encode it. Make sure to remove any newline characters at the end. In Ruby you would do
Base64.encode64(hmac.digest).chompThe signature could be rejected by the server for the following reasons: the request is a POST request and the signature has already been used the request is POST /videos.json and the timestamp is expired for 30 minutes the request is not POST and the timestamp is expired for 5 minutes
Worked example
Firstly, we prepare all the credentials we’ll need.
#!/usr/bin/env bash

api_host="api-eu.pandastream.com"
api_port="443"
cloud_id="2297c22da25dd3ce3ea64513eda642be"
access_key="80a91c7b8d1adeaf25b1"
secret_key="c92dbf4065badf0ca9c4"
timestamp=$(date -u +"%Y-%m-%dT%H%%3A%M%%3A%S.")
printf "timestamp: ${timestamp}\n"
# 2015-04-30T140X0P+0100X0P+003.
We generate timestamp expressed according to ISO 8601. A colon character must be encoded as a %3A.
some_params='some_params=some_value'
canonical_querystring="access_key=${access_key}&cloud_id=${cloud_id}&${some_params}×tamp=${timestamp}"
printf "canonical_querystring: ${canonical_querystring}\n"
# canonical_querystring: access_key=70a91c7b8d1adeaf25b1&cloud_id=1297c22da25dd3ce3ea64513eda642be&some_params=some_value×tamp=2015-04-30T140X0P+0100X0P+003.
We construct properly encoded canonical_querystring. All parameters have a key=value format, are listed in alphabetical order and are separated by an ampersand character (&)
string_to_sign="GET\n${api_host}\n/videos.json\n${canonical_querystring}"
printf "string_to_sign:\n${string_to_sign}\n"
# string_to_sign:
#GET
#api-eu.pandastream.com
#/videos.json
#access_key=70a91c7b8d1adeaf25b1&cloud_id=1297c22da25dd3ce3ea64513eda642be&some_params=some_value×tamp=2015-04-30T140X0P+0100X0P+003.
We first construct string_to_sign by providing HTTP request method, route path and canonical_querystring.
signature=$(printf "${string_to_sign//%/%%}" | openssl dgst -sha256 -binary -hmac "${secret_key}" | sed 's/^.* //' | base64)
printf "signature: ${signature}\n"
# signature: RFyXe4ZiRVRZ3yhztlX8v9s6Oo3Z2amfRxL3CH0NNDc=
The signature is generated by signing that string using HMAC SHA256 and then by encoding its binary output with base 64.
url="https://${api_host}:${api_port}/v2/videos.json?${canonical_querystring}&signature=${signature//+/%2B}"
print "url: ${url}\n"
# url: https://api-eu.pandastream.com:443/v2/videos.json?access_key=70a91c7b8d1adeaf25b1&cloud_id=1297c22da25dd3ce3ea64513eda642be&some_params=some_value×tamp=2015-04-30T140X0P+0100X0P+003.&signature=RFyXe4ZiRVRZ3yhztlX8v9s6Oo3Z2amfRxL3CH0NNDc=
curl "${url}" | python -m json.tool
# % Total % Received % Xferd Average Speed Time Time Time Current
# Dload Upload Total Spent Left Speed
#100 3954 100 3954 0 0 4949 0 --:--:-- --:--:-- --:--:-- 22089
#[
# {
# "audio_bitrate": 112,
# "audio_channels": 2,
# "audio_codec": "aac",
# "audio_sample_rate": 44100,
# "created_at": "2015/04/22 15:08:21 +0000",
# "duration": 14014,
# "extname": ".mp4",
# "file_size": 805301,
# "fps": 29.97,
# "height": 240,
# "id": "cf0161501c17cdc793128c4559f6e57f",
# "mime_type": "video/mp4",
# "original_filename": "panda.mp4",
# "path": "cf0161501c17cdc793128c4559f6e57f",
# "source_url": null,
# "status": "success",
# "updated_at": "2015/04/22 15:08:50 +0000",
# "video_bitrate": 344,
# "video_codec": "h264",
# "width": 300
# }
#]
We create a full request which is send using curl command line.
Things to look into if you’re having signature issues
- Ensure that the timestamp is uppercase and strict iso8601 format.
- Check the url in the
string_to_signdoes not include/v2, even though/v2is required as part of the actual url you will request when accessing the api. - Only url-encode the parameter values of the
canonical_querystringand not the wholestring_to_sign. - The signature should end in an
=sign and not contain any more characters afterwards. For example, if your HMAC library is adding the characters3Dafter the=you must remove these. - Make sure you use the binary digest of the HMAC and not any other outputs such as the hex digest.
- Make sure that URL encoded characters are uppercase (%3A and not %3a).
- Make sure inside the string_to_sign you use
GETfor GET request,POSTfor POST request, etc…
Videos
Video is a restfull resource representing the original media.
It describes all major metadata of a media file, it’s size and it’s original filename.
It contains a status attribute representing the uploading process of media to S3.
status is set to success when the media has been successfully uploaded to S3.
Careful: It does not mean that it’s encodings have been encoded.
Example request
require 'json'

# Simple API
videos = Panda::Video.all()
videos.each { |vid|
    puts(JSON.pretty_generate(vid.attributes))
}

# REST API
videos = Panda.get("/videos.json")
puts(JSON.pretty_generate(videos))
# Simple API
videos = panda.videos.all()
for video in videos:
    print(video.to_json(indent=2))

# REST API
import json
videos = panda.get('/videos.json')
parsed = json.loads(videos)
print(json.dumps(parsed, indent=2))
videos, err := manager.Videos()
if err != nil {
  panic(err)
}
pretty.Println(v)
Example response
{
  "status": "success",
  "extname": ".mp4",
  "audio_sample_rate": 44100,
  "audio_codec": "aac",
  "fps": 29.97,
  "created_at": "2015/04/21 14:28:11 +0000",
  "updated_at": "2015/04/21 14:28:53 +0000",
  "source_url": null,
  "width": 300,
  "audio_channels": 2,
  "video_bitrate": 344,
  "original_filename": "panda.mp4",
  "file_size": 805301,
  "duration": 14014,
  "video_codec": "h264",
  "path": "175afd050df3e6d5aac111f2c7b51d0c",
  "height": 240,
  "id": "175afd050df3e6d5aac111f2c7b51d0c",
  "mime_type": "video/mp4",
  "audio_bitrate": 112
}
GET /videos.json
Returns a collection of Video objects.
Optional parameters
| parameters | attributes |
|---|---|
| status | One of success, fail, processing. Filter by status. |
| page | Default is 1. |
| per_page | Default is 100. |
GET /videos/:id.json
Example request
# Simple API
video = panda.videos.find("472cd69174c4d2b99d9ada70c0dad059")
print(video.to_json(indent=2))

# REST API
import json
video = panda.get('/videos/472cd69174c4d2b99d9ada70c0dad059.json')
parsed = json.loads(video)
print(json.dumps(parsed, indent=2))
require 'json'

# Simple API
video = Panda::Video.find("472cd69174c4d2b99d9ada70c0dad059")
puts(JSON.pretty_generate(video.attributes))

# REST API
video = Panda.get("/videos/472cd69174c4d2b99d9ada70c0dad059.json")
puts(JSON.pretty_generate(video))
video, err := manager.Video("175afd050df3e6d5aac111f2c7b51d0c")
if err != nil {
  panic(err)
}
pretty.Println(v)
Returns a Video object.
Required Parameters
| parameters | attributes |
|---|---|
| id | ID of the Video object. |
Example request
require 'json'

# Simple API
encodings = Panda::Video.find("472cd69174c4d2b99d9ada70c0dad059").encodings()
encodings.each { |enc|
    puts(JSON.pretty_generate(enc.attributes))
}

# REST API
encodings = Panda.get("/videos/472cd69174c4d2b99d9ada70c0dad059/encodings.json")
puts(JSON.pretty_generate(encodings))
## Simple API
encodings = panda.videos.find("472cd69174c4d2b99d9ada70c0dad059").encodings()
for enc in encodings:
    print(enc.to_json(indent=2))

## REST API
import json
video = panda.get('/videos/472cd69174c4d2b99d9ada70c0dad059/encodings.json')
parsed = json.loads(video)
print(json.dumps(parsed, indent=2))
encodings, err := manager.VideoEncodings("472cd69174c4d2b99d9ada70c0dad059",
  &panda.EncodingRequest{
    Page:    1,
    PerPage: 100,
  })
if err != nil {
  panic(err)
}
pretty.Println(encodings)
Example response
{
  "files": [
    "b7c199923b38f72480cdafa8fdac41cc.mp4"
  ],
  "status": "success",
  "audio_channels": 2,
  "profile_id": "2bda90c140d0f79030c45c3dec5ed196",
  "updated_at": "2015/04/22 15:32:22 +0000",
  "height": 480,
  "profile_name": "h2640000000",
  "audio_bitrate": 127,
  "audio_codec": "aac",
  "file_size": 966710,
  "duration": 14015,
  "path": "b7c199923b38f72480cdafa8fdac41cc",
  "extname": ".mp4",
  "id": "b7c199923b38f72480cdafa8fdac41cc",
  "encoding_time": 13,
  "created_at": "2015/04/22 15:31:57 +0000",
  "video_id": "472cd69174c4d2b99d9ada70c0dad059",
  "started_encoding_at": "2015/04/22 15:32:05 +0000",
  "audio_sample_rate": 44100,
  "width": 600,
  "encoding_progress": 100,
  "fps": 29.97,
  "video_codec": "h264",
  "video_bitrate": 421,
  "mime_type": "video/mp4"
}
GET /videos/:id/encodings.json
Returns a collection of Encoding objects connected to specified Video object.
Required Parameters
| parameters | attributes |
|---|---|
| id | ID of the Video object. |
Optional Parameters
| parameters | attributes |
|---|---|
| status | One of success, fail, processing. Filter by status. |
| profile_id | Filter by profile_id. |
| profile_name | Filter by profile_name. |
| screenshots | If set adds extra field to Encoding objects with list of created screenshots. By default is not set. |
| page | Default is 1. |
| per_page | Default is 100. |
Example request
require 'json'

# Simple API
metadata = Panda::Video.find("472cd69174c4d2b99d9ada70c0dad059").metadata
puts(JSON.pretty_generate(metadata))

# REST API
metadata = Panda.get("/videos/472cd69174c4d2b99d9ada70c0dad059/metadata.json")
puts(JSON.pretty_generate(metadata))
# Simple API
metadata = panda.videos.find("472cd69174c4d2b99d9ada70c0dad059").metadata()
print(metadata.to_json(indent=2))

# REST API
import json
metadata = panda.get('/videos/472cd69174c4d2b99d9ada70c0dad059/metadata.json')
parsed = json.loads(metadata)
print(json.dumps(parsed, indent=2))
metadata, err := manager.VideoMetaData("472cd69174c4d2b99d9ada70c0dad059")
if err != nil {
  panic(err)
}
pretty.Println(metadata)
Example response
{
  "source_image_width": 300,
  "create_date": "2007/01/10 05:52:05 +0000",
  "file_type": "MP4",
  "file_name": "472cd69174c4d2b99d9ada70c0dad059.mp4",
  "media_duration": "13.86 s",
  "track_volume": "0.00%",
  "source_image_height": 240,
  "file_size": "786 kB",
  "duration": "14.01 s",
  "preview_time": "0 s",
  "preview_duration": "0 s",
  "media_language_code": "und",
  "minor_version": "0.0.1",
  "current_time": "0 s",
  "movie_header_version": 0,
  "handler_type": "Metadata",
  "track_modify_date": "2007/01/10 05:52:05 +0000",
  "image_width": 300,
  "track_id": 1,
  "selection_time": "0 s",
  "movie_data_size": 799477,
  "compatible_brands": "isom",
  "x_resolution": 72,
  "avg_bitrate": "456 kbps",
  "mime_type": "video/mp4",
  "preferred_volume": "100.00%",
  "time_scale": 600,
  "audio_channels": 2,
  "audio_format": "mp4a",
  "track_duration": "14.01 s",
  "matrix_structure": "1 0 0 0 1 0 0 0 1",
  "major_brand": "MP4  Base Media v1 [IS0 14496-12:2003]",
  "media_modify_date": "2007/01/10 05:52:05 +0000",
  "handler_vendor_id": "Apple",
  "bit_depth": 24,
  "y_resolution": 72,
  "track_create_date": "2007/01/10 05:52:05 +0000",
  "image_size": "300x240",
  "rotation": 0,
  "media_create_date": "2007/01/10 05:52:05 +0000",
  "audio_sample_rate": 44100,
  "selection_duration": "0 s",
  "compressor_id": "avc1",
  "graphics_mode": "srcCopy",
  "track_layer": 0,
  "next_track_id": 3,
  "track_header_version": 0,
  "media_time_scale": 44100,
  "poster_time": "0 s",
  "op_color": "0 0 0",
  "video_frame_rate": 29.969,
  "image_height": 240,
  "modify_date": "2007/01/10 05:52:05 +0000",
  "title": "Panda Sneezes",
  "preferred_rate": 1,
  "balance": 0,
  "handler_description": "GPAC ISO Audio Handler",
  "media_header_version": 0,
  "audio_bits_per_sample": 16
}
GET /videos/:id/metadata.json
Just after the media is uploaded, we analyze and store the metadata that we can extract from it.
Required Parameters
| parameters | attributes |
|---|---|
| id | ID of the Video object. |
Example request
require 'json'

# Simple API
video = Panda::Video.create(
    :source_url => "https://example.com/file.mp4",
    :path_format => "examples/:id",
    :profiles => "h264")
puts(JSON.pretty_generate(video.attributes))

# REST API
video = Panda.post("/videos.json",
    :source_url => "https://example.com/file.mp4",
    :path_format => "examples/:id",
    :profiles => "h264")
puts(JSON.pretty_generate(video))
# Simple API
video = panda.videos.create(
    source_url="https://example.com/file.mp4",
    path_format="examples/:id",
    profiles="h264")
print(video.to_json(indent=2))

# REST API
import json
video = panda.post('/videos.json', {
    "source_url": "https://example.com/file.mp4",
    "path_format": "examples/:id",
    "profiles": "h264" })
parsed = json.loads(video)
print(json.dumps(parsed, indent=2))
video, err := manager.NewVideoURL("https://example.com/file.mp4",
  &panda.NewVideoRequest{
    Profiles:   []string{"h264", "h265"},
    PathFormat: "examples/:id",
  })
if err != nil {
  panic(err)
}
pretty.Println(video)
Example response
{
  "status": "processing",
  "audio_channels": null,
  "original_filename": "t.mp4",
  "updated_at": "2015/05/04 12:12:38 +0000",
  "source_url": "https://example.com/file.mp4",
  "audio_bitrate": null,
  "audio_codec": null,
  "file_size": null,
  "duration": null,
  "path": "examples/ba9f256cf7bceaeab113e6480b4cfdfe",
  "height": null,
  "audio_sample_rate": null,
  "created_at": "2015/05/04 12:12:38 +0000",
  "extname": ".mp4",
  "width": null,
  "id": "ba9f256cf7bceaeab113e6480b4cfdfe",
  "fps": null,
  "video_codec": null,
  "video_bitrate": null,
  "mime_type": null
}
POST /videos.json
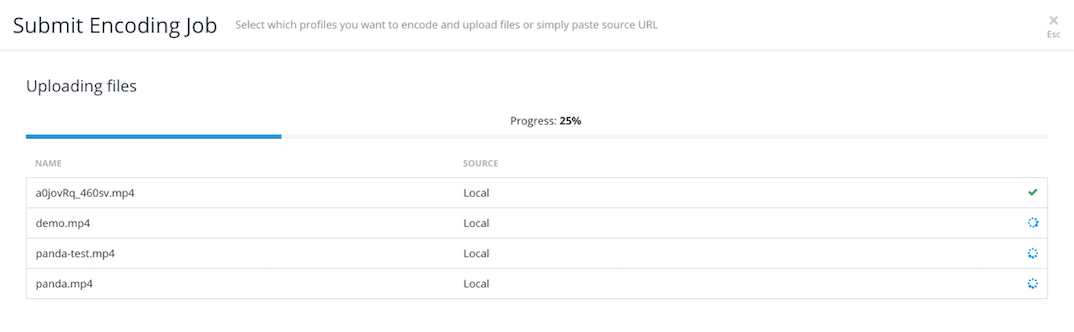
If you use Telestream Cloud in your web application, you’ll probably want to use our Panda Uploader to upload video files from a web page. Otherwise, you can use this API to upload videos. It allows to send multimedia files easily using a single POST request. The main dissadvantage of this approach is that in case of connection failure it doesn’t allow to resume the process, which makes it inapplicable for larger files. For these it’s better to create an upload session through the /videos/upload.json endpoint
Required Parameters
| parameters | attributes |
|---|---|
| file | The file that is being uploaded. |
| source_url | Url of a remote video file. |
If you use the file parameter, make sure that your HTTP request uses an appropriate Content-Type, such as multipart/form-data.
Optional Parameters
| parameters | attributes |
|---|---|
| profiles | Comma-separated list of profile names or IDs to be used during encoding. Alternatively, specify none so no encodings are created yet. |
| path_format | Represents the complete video path without the extension name. It can be constructed using some provided keywords. |
| payload | Arbitrary string stored along the Video object. |
| pipeline | JSON describing profiles pipeline. |
| subtitle_files | Comma-seperated list of urls of a remote subtitle files. |
Example path format
"my-path/:video_id/:profile/:id"
Path Format
The following keywords can be combined to create a path format.
| parameters | attributes |
|---|---|
| id | Id of the encoding. Required. |
| video_id | Id of the video. |
| original | Original filename of the uploaded video |
| date | Date the video was uploaded (2009-10-09). |
| profile | Profile name used by the encoding (original is used when the file is the original video). |
| type | Video type, original or encodings. |
| resolution | Resolution of the video or the encoding (480x340). |
By default path_format is set to :id.
Payload
The payload is an arbitrary text of length 256 or shorter that you can store along the Video. It is typically used to retain an association with one of your own DB record ID.
Example request
# Simple API
us = Panda::UploadSession.new("panda.mp4", profiles: "webm")
puts us.location

# REST API
require 'json'
data = Panda.post("/videos/upload.json",
    :file_size => 21264,
    :file_name => "panda.mp4"
)
puts(JSON.pretty_generate(data))
# Simple API
us = panda.upload_session("file.mp4")
print(us.location)

# REST API
import json
data = panda.post('/videos/upload.json', {
    "file_size": 21264,
    "file_name": "panda.mp4"})
parsed = json.loads(data)
print(json.dumps(parsed, indent=2))
Example response
{
  "id": "3a8795b8d2755a554ea28279c769bba9",
  "location": "https://vm-u5a6i9.upload.pandastream.com/upload/session?id=3a8795b8d2755a554ea28279c769bba9"
}
POST /videos/upload.json
Creates an upload session and returns its unique endpoint location, which can be used to upload multimedia file in chunks using upload API .
Required parameters
| parameters | attributes |
|---|---|
| file_size | Size in bytes of the video. |
| file_name | File name of the video. |
Optional parameters
| parameters | attributes |
|---|---|
| use_all_profiles | Default is false. |
| profiles | Comma-separated list of profile names or IDs to be used during encoding. Alternatively, specify none so no encodings are created yet. |
| path_format | Represents the complete video path without the extension name. It can be constructed using some provided keywords. |
| payload | Arbitrary string stored along the Video object. |
| pipeline | JSON describing profiles pipeline. |
Example request
require 'json'

## Simple API
Panda::Video.delete("a6daf6589b9c714fb8c2928d916a87ca")

# REST API
ret = Panda.delete("/videos/cce990c5658e45fafb5329aa779c9018.json")
puts(JSON.pretty_generate(ret))
# Simple API
video = panda.videos.find("730d5677101fa5610b5db46cddbe72a8").delete()
print(video.to_json(indent=2))

# REST API
import json
video = panda.delete('/videos/2474768f8cb58ffd0192696701c0e4ad.json')
parsed = json.loads(video)
print(json.dumps(parsed, indent=2))
video, err := manager.Video("2474768f8cb58ffd0192696701c0e4ad")
if err != nil {
  panic(err)
}
if err := manager.Delete(&video); err != nil {
  panic(err)
}
Example response
{
  "deleted": true
}
DELETE /videos/:id.json
Deletes requested video from panda and your storage. Returns an information whether the operation was successful.
Required Parameters
| parameters | attributes |
|---|---|
| id | ID of the Video object. |
Example request
require 'json'

# REST API
ret = Panda.delete("/videos/f7849488f82dd0c75fce910a88a1af74/source.json")
puts(JSON.pretty_generate(ret))
# REST API
import json
ret = panda.delete("/videos/c8a995f749eca5ce2daab627ffb66ed8/source.json")
parsed = json.loads(ret)
print(json.dumps(parsed, indent=2))
err := manager.DeleteSource("2474768f8cb58ffd0192696701c0e4ad")
if err != nil {
  panic(err)
}
Example response
{
  "deleted": true
}
DELETE /videos/:id/source.json
Deletes only source file from storage.
Required Parameters
| parameters | attributes |
|---|---|
| id | ID of the Video object. |
Encodings
Each encoding represents a version of a video encoded with the settings defined in the profile used. When an encoding is created (either automatically when a video is uploaded, or using the POST method below) it is immediately placed on your encoding queue.
If the original video has been successfully downloaded, the video status will be set to success.
If the video has failed, the encoding will fail as well.
If the encoding was successful, you can download it or play it using the following convention $path$$extname$. Both values can be retrieved using the API.
If the encoding fails, this is usually because there was either an invalid profile being used, or the origin video is corrupted or not recognised. In this case, a logfile will be uploaded to your storage (with the filename $path$.log) containing some debug information which can help in correcting issues caused by an invalid profile.
Example request
require 'json'

# Simple API
encodings = Panda::Encoding.all()
encodings.each { |enc|
    puts(JSON.pretty_generate(enc.attributes))
}

# REST API
encodings = Panda.get("/encodings.json")
puts(JSON.pretty_generate(encodings))
# Simple API
encodings = panda.encodings.all()
for enc in encodings:
    print(enc.to_json(indent=2))

# REST API
import json
encodings = panda.get('/encodings.json')
parsed = json.loads(encodings)
print(json.dumps(parsed, indent=2))
encodings, err := m.Encodings(
  &panda.EncodingRequest{
    Page:    1,
    PerPage: 100,
  })
if err != nil {
  panic(err)
}
pretty.Println(encodings)
Example response
{
  "id": "de9ebb55479e3b682eb4e5615df14392",
  "status": "success",
  "created_at": "2015/05/04 14:52:52 +0000",
  "updated_at": "2015/05/04 14:54:02 +0000",
  "started_encoding_at": "2015/05/04 14:53:01 +0000",
  "encoding_time": 35,
  "encoding_progress": 100,
  "video_id": "e427da58f8042bc20b150ef2da7bf6f1",
  "profile_id": "9097cfc74bc176b51fa9db707457b29c",
  "profile_name": "h264",
  "files": [
    "de9ebb55479e3b682eb4e5615df14392.mp4"
  ],
  "mime_type": "video/mp4",
  "duration": 14015,
  "height": 480,
  "width": 600,
  "extname": ".mp4",
  "file_size": 966710,
  "video_bitrate": 421,
  "audio_bitrate": 127,
  "audio_codec": "aac",
  "video_codec": "h264",
  "fps": 29.97,
  "audio_channels": 2,
  "audio_sample_rate": 44100,
  "path": "de9ebb55479e3b682eb4e5615df14392",
  "cloud_id": "1297c22da25dd3ce3ea64513eda642be"
}
GET /encodings.json
Returns a collection of Encoding objects.
Optional parameters
| parameters | attributes |
|---|---|
| status | One of success, fail, processing. Filter by status. |
| profile_id | Filter by profile_id. |
| profile_name | Filter by profile_name. |
| video_id | Filter by video_id. |
| screenshots | If set adds extra field to Encoding objects with list of created screenshots. By default is not set. |
| page | Default is 1. |
| per_page | Default is 100. |
Example request
# Simple API
enc = panda.encodings.find("de9ebb55479e3b682eb4e5615df14392")
print(enc.to_json(indent=2))

# REST API
enc = Panda.get("/encodings/de9ebb55479e3b682eb4e5615df14392.json")
parsed = json.loads(enc)
print(json.dumps(parsed, indent=2))
require 'json'

# Simple API
enc = Panda::Encoding.find("de9ebb55479e3b682eb4e5615df14392")
puts(JSON.pretty_generate(enc.attributes))

# REST API
enc = Panda.get("/encodings/de9ebb55479e3b682eb4e5615df14392.json")
puts(JSON.pretty_generate(enc))
encoding, err := manager.Encoding("de9ebb55479e3b682eb4e5615df14392")
if err != nil {
  panic(err)
}
pretty.Println(encodings)
GET /encodings/:id.json
Returns a Encoding object.
Required Parameters
| parameters | attributes |
|---|---|
| id | ID of the Encoding object. |
| screenshots | If set adds extra field to Encoding objects with list of created screenshots. By default is not set. |
Example request
require 'json'

# Simple API
enc = Panda::Encoding.create(
    :video_id => "788dfd45b9bef06d9c93c426e936fa9a",
    :profile_name => "h264")
puts(JSON.pretty_generate(enc.attributes))

# REST API
video = Panda.post("/encodings.json",
    :video_id => "a321dcc4418dd5ea2d30c11f655c3646",
    :profile_name => "h264")
puts(JSON.pretty_generate(video))
imple API
enc = panda.encodings.create(
    video_id = "9c6b1114d01011fa50b4e7eddd642009",
    profile_name = "h264")
print(enc.to_json(indent=2))

# REST API
import json
enc = panda.post('/encodings.json', {
    "video_id": "95bdade61f551b49aa969586f914eca1",
    "profile_name": "h264"})
parsed = json.loads(enc)
print(json.dumps(parsed, indent=2))
encoding, err := m.NewEncoding(
  &panda.NewEncodingRequest{
    VideoID:     "a321dcc4418dd5ea2d30c11f655c3646",
    ProfileName: "h264",
  })
if err != nil {
  panic(err)
}
pretty.Println(encoding)
Example response
{
  "id": "26121714b09447843e821d0528fbe106",
  "status": "processing",
  "created_at": "2015/05/04 15:20:42 +0000",
  "updated_at": "2015/05/04 15:20:42 +0000",
  "started_encoding_at": null,
  "encoding_time": null,
  "encoding_progress": null,
  "video_id": "a321dcc4418dd5ea2d30c11f655c3646",
  "profile_id": "9097cfc74bc176b51fa9db707457b29c",
  "profile_name": "h264",
  "files": [

  ],
  "mime_type": null,
  "duration": null,
  "height": null,
  "width": null,
  "extname": ".mp4",
  "file_size": null,
  "video_bitrate": null,
  "audio_bitrate": null,
  "audio_codec": null,
  "video_codec": null,
  "fps": null,
  "audio_channels": null,
  "audio_sample_rate": null,
  "path": "26121714b09447843e821d0528fbe106"
}
POST /encodings.json
Create a new encoding for a video that already exists.
Required parameters
One of the profile_id or profile_name parameter is required:
| parameters | attributes |
|---|---|
| video_id | ID of existing video. |
| profile_id | ID of existing profile. |
| profile_name | Name of existing profile. |
| screenshots | If set adds extra field to Encoding objects with list of created screenshots. By default is not set. |
Example request
# Simple API
enc = Panda::Encoding.find("de9ebb55479e3b682eb4e5615df14392")
enc.cancel()

# REST API
video = Panda.post("/encodings/de9ebb55479e3b682eb4e5615df14392/cancel.json",
# Simple API
enc = panda.encodings.find("de9ebb55479e3b682eb4e5615df14392")
enc.cancel()

# REST API
encodings = panda.post('/encodings/de9ebb55479e3b682eb4e5615df14392/cancel.json')
if err := manager.Cancel("de9ebb55479e3b682eb4e5615df14392"); err != nil {
  panic(err)
}
POST /encodings/:id/cancel.json
Cancel an encoding. Returns nothing.
Required Parameters
| parameters | attributes |
|---|---|
| id | ID of the Encoding object. |
Example request
# Simple API
enc = Panda::Encoding.find("de9ebb55479e3b682eb4e5615df14392")
enc.retry()

# REST API
video = Panda.post("/encodings/de9ebb55479e3b682eb4e5615df14392/retry.json",
# Simple API
enc = panda.encodings.find("de9ebb55479e3b682eb4e5615df14392")
enc.retryl()

# REST API
encodings = panda.post('/encodings/de9ebb55479e3b682eb4e5615df14392/retry.json')
if err := manager.Retry("de9ebb55479e3b682eb4e5615df14392"); err != nil {
  panic(err)
}
POST /encodings/:id/retry.json
Retry a failed encoding. Returns nothing.
Required Parameters
| parameters | attributes |
|---|---|
| id | ID of the Encoding object. |
Example request
# Simple API
enc = Panda::Encoding.find("de9ebb55479e3b682eb4e5615df14392")
enc.delete()

# REST API
video = Panda.delete("/encodings/de9ebb55479e3b682eb4e5615df14392.json",
# Simple API
enc = panda.encodings.find("de9ebb55479e3b682eb4e5615df14392")
enc.delete()

# REST API
encodings = panda.delete('/encodings/de9ebb55479e3b682eb4e5615df14392.json')
encoding, err := m.Encoding("de9ebb55479e3b682eb4e5615df14392")
if err != nil {
  panic(err)
}
if err = m.Delete(&encoding); err != nil {
  panic(err)
}
Example response
{
  "deleted": true
}
DELETE /encodings/:id.json
Deletes requested encoding from panda and your storage. Returns an information whether the operation was successful
Required Parameters
| parameters | attributes |
|---|---|
| id | ID of the Encoding object. |
Profiles
Example request
require 'json'

# Simple API
profiles = Panda::Profile.all()
profiles.each { |prof|
    puts(JSON.pretty_generate(prof.attributes))
}

# REST API
profiles = Panda.get("/profiles.json")
puts(JSON.pretty_generate(profiles))
panda = panda.Panda(
    access_key = "70a91c7b8d1adeaf25b1",
    secret_key = "b92dbf4065badf0ca9c4",
    cloud_id = "1297c22da25dd3ce3ea64513eda642be",
    api_host = "api-eu.pandastream.com",
    api_port = "443"
)

# Simple API
profiles = panda.profiles.all()
for profile in profiles:
    print(profile.to_json(indent=2))

# REST API
import json
profiles = panda.get('/profiles.json')
parsed = json.loads(profiles)
print(json.dumps(parsed, indent=2))
profiles, err := manager.Profiles(
  &panda.ProfileRequest{
    Page:    1,
    PerPage: 100,
  })
if err != nil {
  panic(err)
}
pretty.Println(profiles)
Example response
{
  "keyframe_interval": 250,
  "preset_name": "h264",
  "updated_at": "2015/05/04 10:03:50 +0000",
  "height": 480,
  "width": 640,
  "upscale": true,
  "audio_bitrate": 128,
  "id": "9097cfc74bc176b51fa9db707457b29c",
  "audio_sample_rate": 44100,
  "name": "h264",
  "title": "MP4 (H.264)",
  "video_bitrate": null,
  "extname": ".mp4",
  "priority": null,
  "add_timestamp": null,
  "aspect_mode": "letterbox",
  "created_at": "2015/05/04 10:03:50 +0000"
}
GET /profiles.json
Returns a collection of Profile objects.
Optional parameters
| parameters | attributes |
|---|---|
| expand | If expand option is set Profile objects will contain all command parameters, even if their value is default. By default is not set. |
| page | Default is 1. |
| per_page | Default is 100. |
Example request
require 'json'

# Simple API
prof = Panda::Profile.find("9097cfc74bc176b51fa9db707457b29c")
puts(JSON.pretty_generate(prof.attributes))

# REST API
prof = Panda.get("/profiles/9097cfc74bc176b51fa9db707457b29c.json")
puts(JSON.pretty_generate(prof))
# Simple API
profile = panda.profiles.find("9097cfc74bc176b51fa9db707457b29c")
print(profile.to_json(indent=2))

# REST API
import json
profile = panda.get('/profiles/9097cfc74bc176b51fa9db707457b29c.json')
parsed = json.loads(profile)
print(json.dumps(parsed, indent=2))
profile, err := manager.Profile("9097cfc74bc176b51fa9db707457b29c")
if err != nil {
  panic(err)
}
pretty.Println(profile)
Example response
{
  "keyframe_interval": 250,
  "preset_name": "h264",
  "updated_at": "2015/05/04 10:03:50 +0000",
  "height": 480,
  "width": 640,
  "upscale": true,
  "audio_bitrate": 128,
  "id": "9097cfc74bc176b51fa9db707457b29c",
  "audio_sample_rate": 44100,
  "name": "h264",
  "title": "MP4 (H.264)",
  "video_bitrate": null,
  "extname": ".mp4",
  "priority": null,
  "add_timestamp": null,
  "aspect_mode": "letterbox",
  "created_at": "2015/05/04 10:03:50 +0000"
}
GET /profiles/:id_or_name.json
Returns a Profile object.
Required Parameters
| parameters | attributes |
|---|---|
| id_or_name | ID or name of the Profile object. |
| expand | If expand option is set Profile objects will contain all command parameters, even if their value is default. By default is not set. |
POST /profiles.json
Adds new profile to cloud. It can be used later to encode videos.
Using presets
Example request
require 'json'

# Simple API
prof = Panda::Profile.create(
    :preset_name => "h264",
    :name => "h264_1",
    :fps => 45
)
puts(JSON.pretty_generate(prof.attributes))

# REST API
prof = Panda.post("/profiles.json",
    :preset_name => "h264",
    :name => "h264_2",
    :fps => 45
)
puts(JSON.pretty_generate(prof))
# Simple API
prof = panda.profiles.create(
    preset_name = "h264",
    name = "h264_1",
    fps = 45
)
print(prof.to_json(indent=2))

# REST API
import json
prof = panda.post('/profiles.json', {
    "preset_name": "h264",
    "name": "h264_2",
    "fps": 45
})
parsed = json.loads(prof)
print(json.dumps(parsed, indent=2))
profile, err := manager.NewProfile(
  &panda.NewProfileRequest{
    PresetName:   "h264",
    AspectMode:   panda.ModeLetterBox,
    Fps:          45.0,
    Name:         "h264_1",
    Width:        640,
    Height:       480,
  })
if err != nil {
  panic(err)
}
fmt.Println(profile)
Example response
{
  "id": "51622c67ea55bcfb698e34398b8e06ba",
  "name": "h264_1",
  "priority": 0,
  "created_at": "2015/05/18 13:21:21 +0000",
  "updated_at": "2015/05/18 13:21:21 +0000",
  "extname": ".mp4",
  "audio_sample_rate": 44100,
  "keyframe_interval": 250,
  "fps": 45.0,
  "aspect_mode": "letterbox",
  "add_timestamp": false,
  "title": "MP4 (H.264)",
  "preset_name": "h264",
  "upscale": true,
  "width": 640,
  "height": 480,
  "video_bitrate": null,
  "audio_bitrate": 128,
  "cloud_id": "1297c22da25dd3ce3ea64513eda642be"
}
Required parameters
| parameters | attributes |
|---|---|
| preset_name | Name of preset to use. |
Optional parameters
| parameters | attributes |
|---|---|
| name | Unique machine-readable name that will identify the profile. Helpful later on for filtering encodings by profile. |
| title | Human-readable name. |
| extname | File extension. Example: ".mp4". |
| width | Width in pixels. Example: 1080. |
| height | Height in pixels. Example: 720. |
| upscale | Upscale the video resolution to match your profile. Default is true. |
| aspect_mode | Default is "letterbox". |
| two_pass | Default is false. |
| video_bitrate | Example: 3000. |
| fps | Null value copy the original fps. By default it is not set. Example: 29.97. |
| keyframe_interval | Adds a key frame every 250 frames. Default is 250, adds a key frame every 250 frames. |
| keyframe_rate | Example: 0.5, adds a key frame every 2 seconds. |
| audio_bitrate | Example: 128. |
| audio_sample_rate | Default is 44100. |
| audio_channels | By default it is not set. |
| clip_length | Sets the clip’s duration. Example: "00:20:00". |
| clip_offset | Clip starts at a specific offset. Example: "00:00:10". |
| watermark_url | Url of the watermark image. |
| watermark_top | Distance from the top of the video frame. Works like CSS. Default is 0. |
| watermark_bottom | Distance from the bottom of the video frame. Works like CSS. Default is 0. |
| watermark_left | Distance from the left of the video frame. Works like CSS. Default is 0. |
| watermark_right | Distance from the right of the video frame. Works like CSS. Default is 0. |
| watermark_width | Width of the watermark image. Default is no resizing. |
| watermark_height | Height of the watermark image. Default is no resizing. |
| frame_count | Evenly spaced number of generated screenshots. Default is 7. |
| expand | If expand option is set Profile objects will contain all command parameters, even if their value is default. By default is not set. |
| add_timestamp | Adds timestamp to your video. By default is not set. |
| max_rate | By default is not set. |
| buffer_size | By default is not set. |
| deinterlace | One of keep_fps or double_fps. By default is not set. |
Aspect Modes
| parameters | attributes |
|---|---|
| preserve | Original size and ratio is preserved. |
| constrain | Aspect ratio is maintained.No black bars is added to your output. |
| letterbox | Aspect ratio is maintained.Adds black bars to your output to match your profile frame height (above and below only). |
| pad | Aspect ratio is maintained.Adds black bars to your output to match your profile frame size. |
| crop | Aspect ratio is maintained.fills your profile frame size and crops the rest. |
(NEW) Initial crop
| parameters | attributes |
|---|---|
| crop_input_left | Distance (in pixels) from the left edge of the screen from which you want your crop to be done. |
| crop_input_right | Distance (in pixels) from the right edge of the screen from which you want your crop to be done. |
| crop_input_top | Distance (in pixels) from the top edge of the screen from which you want your crop to be done. |
| crop_input_bottom | Distance (in pixels) from the bottom edge of the screen from which you want your crop to be done. |
| crop_input_width | Width of the cropped image in pixels. |
| crop_input_height | Height of the cropped image in pixels. |
It is possible to set initial crop for input video before encoding. Note that you need to specify only two out of three parameters for each axis (crop_input_left, crop_input_right and crop_input_width for X axis and crop_input_top, crop_input_bottom and crop_input_height for Y axis) or else we will return an error. E.g. if you would like to crop area with size 150x150 at position (120,50) set the following values in the profile:
require 'json'

# Simple API
prof = Panda::Profile.create(
    :preset_name => "h264",
    :name => "h264_cropped",
    :fps => 45,
    :crop_input_left => 120,
    :crop_input_top => 50,
    :crop_input_width => 150,
    :crop_input_height => 150
)
puts(JSON.pretty_generate(prof.attributes))

# REST API
prof = Panda.post("/profiles.json",
        :preset_name => "h264",
        :name => "h264_cropped",
        :fps => 45
        :crop_input_left => 120,
        :crop_input_top => 50,
        :crop_input_width => 150,
        :crop_input_height => 150
)
puts(JSON.pretty_generate(prof))
H264 preset
| parameters | attributes |
|---|---|
| h264_crf | Example: 23. |
| h264_profile | Example: "baseline". |
| h264_level | Example: "3.1". |
| closed_captions | One of add (adds captions as seperate streams) or burn (burns captions on video stream using first subtitle file). By default is not set. |
JPEG preset
| parameters | attributes |
|---|---|
| frame_count | Evenly spaced number of thumbnails. Example: 7. |
| frame_offsets | Array of offset (Frames or seconds). Example: "2s, 10s, 250f, 400f" |
| frame_interval | Thumbnail interval (Frames or seconds). Example: "1000f". |
HLS.Variant.Playlist presets
| parameters | attributes |
|---|---|
| variants | Pattern to match HLS.Variant presets by name. Default is hls.*. |
Using custom settings
Example request
# Simple API
prof = Panda::Profile.create(
    :title => "H264 normal quality",
    :name => "h264_1",
    :extname => ".mp4",
    :width => 320,
    :height => 240,
    :audio_bitrate => 128,
    :video_bitrate => 500,
    :aspect_mode => "pad",
    :command => "ffmpeg -i $input_file$ -c:a libfaac $audio_bitrate$ -c:v libx264 $video_bitrate$ -preset medium $filters$ -y $output_file$")
puts(JSON.pretty_generate(prof.attributes))

# REST API
prof = Panda.post("/profiles.json",
    :title => "H264 normal quality",
    :name => "h264_2",
    :extname => ".mp4",
    :width => 320,
    :height => 240,
    :audio_bitrate => 128,
    :video_bitrate => 500,
    :aspect_mode => "pad",
    :command => "ffmpeg -i $input_file$ -c:a libfaac $audio_bitrate$ -c:v libx264 $video_bitrate$ -preset medium $filters$ -y $output_file$")
puts(JSON.pretty_generate(prof))
# Simple API
prof = panda.profiles.create(
    title = "H264 normal quality",
    name = "h264_1",
    extname = ".mp4",
    width = 320,
    height = 240,
    audio_bitrate = 128,
    video_bitrate = 500,
    aspect_mode = "pad",
    command = "ffmpeg -i $input_file$ -c:a libfaac $audio_bitrate$ -c:v libx264 $video_bitrate$ -preset medium $filters$ -y $output_file$")
print(prof.to_json(indent=2))

# REST API
import json
prof = panda.post('/profiles.json', {
    "title": "H264 normal quality",
    "name": "h264_2",
    "extname": ".mp4",
    "width": 320,
    "height": 240,
    "audio_bitrate": 128,
    "video_bitrate": 500,
    "aspect_mode": "pad",
    "command": "ffmpeg -i $input_file$ -c:a libfaac $audio_bitrate$ -c:v libx264 $video_bitrate$ -preset medium $filters$ -y $output_file$" })
parsed = json.loads(prof)
print(json.dumps(parsed, indent=2))
profile, err := manager.NewProfile(
  &panda.NewProfileRequest{
      Command:      "ffmpeg -i $input_file$ -c:a libfaac $audio_bitrate$ -c:v libx264 $video_bitrate$ -preset medium $filters$ -y $output_file$",
      Extname:      ".mp4",
      AspectMode:   panda.ModePad,
      Name:         "h264_2",
      Width:        320,
      Height:       240,
      AudioBitrate: 128,
      VideoBitrate: 500,
  })
if err != nil {
  panic(err)
}
fmt.Println(profile)
Example response
{
  "updated_at": "2015/05/18 13:34:41 +0000",
  "height": 240,
  "width": 320,
  "upscale": true,
  "audio_bitrate": 128,
  "id": "dcdeb1f15f9a344bb67f0623fa55c1a3",
  "stack": "corepack-1",
  "name": "h264_1",
  "title": "H264 normal quality",
  "video_bitrate": 500,
  "extname": ".mp4",
  "priority": 0,
  "add_timestamp": false,
  "command": "ffmpeg -i $input_file$ -c:a libfaac $audio_bitrate$ -c:v libx264 $video_bitrate$ -preset medium $filters$ -y $output_file$",
  "aspect_mode": "pad",
  "full_command": "The recipe tried to use ffmpeg which does not exist",
  "created_at": "2015/05/18 13:34:41 +0000"
}
Required parameters
| parameters | attributes |
|---|---|
| command | Line break separated list of encoding commands to run. |
| extname | File extension. Example: ".mp4". |
Optional parameters
| parameters | attributes |
|---|---|
| name | Unique machine-readable name that will identify the profile. Helpful later on for filtering encodings by profile. |
| title | Human-readable name. |
| stack | The name of the stack to use. One of corepack-2, corepack-3, corepack-4. By default is not set. |
| width | Width in pixels. Example: 1080. |
| height | Height in pixels. Example: 720. |
| upscale | Upscale the video resolution to match your profile. Default is true. |
| aspect_mode | Default is "letterbox". |
| two_pass | Default is false. |
| video_bitrate | Example: 3000. |
| fps | Null value copy the original fps. By default it is not set. Example: 29.97. |
| keyframe_interval | Adds a key frame every 250 frames. Default is 250, adds a key frame every 250 frames. |
| keyframe_rate | Example: 0.5, adds a key frame every 2 seconds. |
| audio_bitrate | Example: 128. |
| audio_sample_rate | Default is 44100. |
| audio_channels | By default it is not set. |
| clip_length | Sets the clip’s duration. Example: "00:20:00". |
| clip_offset | Clip starts at a specific offset. Example: "00:00:10". |
| watermark_url | Url of the watermark image. |
| watermark_top | Distance from the top of the video frame. Works like CSS. Default is 0. |
| watermark_bottom | Distance from the bottom of the video frame. Works like CSS. Default is 0. |
| watermark_left | Distance from the left of the video frame. Works like CSS. Default is 0. |
| watermark_right | Distance from the right of the video frame. Works like CSS. Default is 0. |
| watermark_width | Width of the watermark image. Default is no resizing. |
| watermark_height | Height of the watermark image. Default is no resizing. |
| frame_count | Evenly spaced number of generated screenshots. Default is 7. |
| expand | If expand option is set Profile objects will contain all command parameters, even if their value is default. By default is not set. |
| add_timestamp | Adds timestamp to your video. By default is not set. |
| max_rate | By default is not set. |
| buffer_size | By default is not set. |
| deinterlace | One of keep_fps or double_fps. By default is not set. |
Example request
require 'json'

# Simple API
prof = Panda::Profile.find("9097cfc74bc176b51fa9db707457b29c")
prof.video_bitrate = 1200
prof.fps = 40
prof.save()
puts(JSON.pretty_generate(prof.attributes))

# REST API
prof = Panda.put("/profiles/9097cfc74bc176b51fa9db707457b29c.json", {
    :video_bitrate => 1200,
    :fps => 40
})
puts(JSON.pretty_generate(prof))
# Simple API
prof = panda.profiles.find("9097cfc74bc176b51fa9db707457b29c")

prof.video_bitrate = 1200
prof.fps = 40

prof = prof.save()
print(prof.to_json(indent=2))

# REST API
import json
prof = panda.put('/profiles/9097cfc74bc176b51fa9db707457b29c.json', {
    "video_bitrate": 1200,
    "fps": 40
})
parsed = json.loads(prof)
print(json.dumps(parsed, indent=2))
profile, err := manager.Profile("9097cfc74bc176b51fa9db707457b29c")
if err != nil {
  panic(err)
}
profile.Fps = 40
profile.VideoBitrate = 1200
if err := manager.Update(&profile); err != nil {
  panic(err)
}
pretty.Println(profile)
Example response
{
  "preset_name": "h264",
  "name": "h264",
  "video_bitrate": 1250,
  "fps": 40.0,
  "created_at": "2015/05/04 10:03:50 +0000",
  "title": "MP4 (H.264)",
  "updated_at": "2015/05/19 08:07:24 +0000",
  "extname": ".mp4",
  "priority": 0,
  "add_timestamp": false,
  "width": 640,
  "upscale": false,
  "aspect_mode": "letterbox",
  "audio_sample_rate": 44100,
  "audio_bitrate": 128,
  "height": 480,
  "id": "9097cfc74bc176b51fa9db707457b29c",
  "keyframe_interval": 250
}
PUT /profiles/:id.json
Edit existing profile settings.
Required parameters
| parameters | attributes |
|---|---|
| id | ID of the Profile object. |
Optional parameters
| parameters | attributes |
|---|---|
| name | Unique machine-readable name that will identify the profile. Helpful later on for filtering encodings by profile. |
| title | Human-readable name. |
| stack | The name of the stack to use. One of corepack-2, corepack-3, corepack-4. By default is not set. |
| extname | File extension. Example: ".mp4". |
| width | Width in pixels. Example: 1080. |
| height | Height in pixels. Example: 720. |
| upscale | Upscale the video resolution to match your profile. Default is true. |
| aspect_mode | Default is "letterbox". |
| two_pass | Default is false. |
| video_bitrate | Example: 3000. |
| fps | Null value copy the original fps. By default it is not set. Example: 29.97. |
| keyframe_interval | Adds a key frame every 250 frames. Default is 250, adds a key frame every 250 frames. |
| keyframe_rate | Example: 0.5, adds a key frame every 2 seconds. |
| audio_bitrate | Example: 128. |
| audio_sample_rate | Default is 44100. |
| audio_channels | By default it is not set. |
| clip_length | Sets the clip’s duration. Example: "00:20:00". |
| clip_offset | Clip starts at a specific offset. Example: "00:00:10". |
| watermark_url | Url of the watermark image. |
| watermark_top | Distance from the top of the video frame. Works like CSS. Default is 0. |
| watermark_bottom | Distance from the bottom of the video frame. Works like CSS. Default is 0. |
| watermark_left | Distance from the left of the video frame. Works like CSS. Default is 0. |
| watermark_right | Distance from the right of the video frame. Works like CSS. Default is 0. |
| watermark_width | Width of the watermark image. Default is no resizing. |
| watermark_height | Height of the watermark image. Default is no resizing. |
| frame_count | Evenly spaced number of generated screenshots. Default is 7. |
| expand | If expand option is set Profile objects will contain all command parameters, even if their value is default. By default is not set. |
| add_timestamp | Adds timestamp to your video. By default is not set. |
| max_rate | By default is not set. |
| buffer_size | By default is not set. |
| deinterlace | One of keep_fps or double_fps. By default is not set. |
Aspect Modes
| parameters | attributes |
|---|---|
| preserve | Original size and ratio is preserved. |
| constrain | Aspect ratio is maintained.No black bars is added to your output. |
| letterbox | Aspect ratio is maintained.Adds black bars to your output to match your profile frame height (above and below only). |
| pad | Aspect ratio is maintained.Adds black bars to your output to match your profile frame size. |
| crop | Aspect ratio is maintained.fills your profile frame size and crops the rest. |
H264 preset
| parameters | attributes |
|---|---|
| h264_crf | Example: 23. |
| h264_profile | Example: "baseline". |
| h264_level | Example: "3.1". |
| closed_captions | One of add (adds captions as seperate streams) or burn (burns captions on video stream using first subtitle file). By default is not set. |
JPEG preset
| parameters | attributes |
|---|---|
| frame_count | Evenly spaced number of thumbnails. Example: 7. |
| frame_offsets | Array of offset (Frames or seconds). Example: "2s, 10s, 250f, 400f" |
| frame_interval | Thumbnail interval (Frames or seconds). Example: "1000f". |
HLS.Variant.Playlist presets
| parameters | attributes |
|---|---|
| variants | Pattern to match HLS.Variant presets by name. Default is hls.*. |
Example request
# Simple API
Panda::Profile.delete("a6daf6589b9c714fb8c2928d916a87ca")

# REST API
Panda.delete("/profiles/cce990c5658e45fafb5329aa779c9018.json")
# Simple API
prof = panda.profiles.find("9097cfc74bc176b51fa9db707457b29c")
prof.delete()

# REST API
panda.delete('/profiles/de9ebb55479e3b682eb4e5615df14392.json')
profile, err := manager.Profile("9097cfc74bc176b51fa9db707457b29c")
if err != nil {
  panic(err)
}
if err := manager.Delete(&profile); err != nil {
  panic(err)
}
Example response
{
  "deleted": true
}
DELETE /profiles/:id.json
Deletes requested profile from your cloud. Returns an information whether the operation was successful.
Required Parameters
| parameters | attributes |
|---|---|
| id | ID of the Profile object. |
Clouds
Example request
require 'json'

# Simple API
clouds = Panda::Cloud.all()
clouds.each { |cld|
    puts(JSON.pretty_generate(cld.attributes))
}

# REST API
clouds = Panda.get("/clouds.json")
puts(JSON.pretty_generate(clouds))
# Simple API
clouds = panda.clouds.all()
for cld in clouds:
    print(cld.to_json(indent=2))

# REST API
import json
clouds = panda.get('/clouds.json')
parsed = json.loads(clouds)
print(json.dumps(parsed, indent=2))
clouds, err := manager.Clouds()
if err != nil {
  panic(err)
}
pretty.Println(clouds)
Example response
{
  "s3_videos_bucket": "mariusz-bucket",
  "id": "e6ff0ed4b7880bfc1ad075963cce2db8",
  "name": "GCS",
  "url": "https://storage.googleapis.com/satap-bucket/",
  "created_at": "2014/11/05 14:51:14 +0000",
  "s3_private_access": false,
  "updated_at": "2014/11/05 14:51:14 +0000"
}
GET /clouds.json
Returns a collection of Cloud objects.
Example request
require 'json'

# Simple API
cloud = Panda::Cloud.find("477bd69174c4d2b99d9ada70c0dad059")
puts(JSON.pretty_generate(video.attributes))

# REST API
cloud = Panda.get("/clouds/477bd69174c4d2b99d9ada70c0dad059.json")
puts(JSON.pretty_generate(video))
# Simple API
cloud = panda.clouds.find("477bd69174c4d2b99d9ada70c0dad059")
print(cloud.to_json(indent=2))

# REST API
import json
cloud = panda.get('/clouds/477bd69174c4d2b99d9ada70c0dad059.json')
parsed = json.loads(cloud)
print(json.dumps(parsed, indent=2))
cloud, err := manager.Cloud("477bd69174c4d2b99d9ada70c0dad059")
if err != nil {
  panic(err)
}
pretty.Println(cloud)
Example response
{
  "id": "e122090f4e506ae9ee266c3eb78a8b67",
  "name": "my_first_cloud",
  "s3_videos_bucket": "my-example-bucket",
  "s3_private_access":false,
  "url": "http://my-example-bucket.s3.amazonaws.com/",
  "created_at": "2010/03/18 12:56:04 +0000",
  "updated_at": "2010/03/18 12:59:06 +0000"
}
GET /clouds/:id.json
Returns a Cloud object.
Required Parameters
| parameters | attributes |
|---|---|
| id | ID of the Cloud object. |
Example request
require 'json'

# Simple API
cld = Panda::Cloud.find("1297c22da25ddda2bea64513eda642be")
cld.name = "test"
cld.save()
puts(JSON.pretty_generate(cld.attributes))

# REST API
prof = Panda.put("/clouds/1297c22da25ddda2bea64513eda642be.json", {
    :name => "test",
})
puts(JSON.pretty_generate(prof))
# Simple API
cloud = panda.clouds.find("1297c22da25dd3ce3ea64513eda642be")
cloud["name"] = "test"
cloud = cloud.save()
print(cloud.to_json(indent=2))

# REST API
import json
cloud = panda.put("/clouds/1297c22da25dd3ce3ea64513eda642be.json", {
    "name": "test"
})
parsed = json.loads(cloud)
print(json.dumps(parsed, indent=2))
Example response
{
  "id": "e122090f4e506ae9ee266c3eb78a8b67",
  "name": "test",
  "s3_videos_bucket": "my-example-bucket",
  "s3_private_access": false,
  "created_at":"2010/03/18 12:56:04 +0000",
  "url": "http://my-example-bucket.s3.amazonaws.com/",
  "updated_at":"2010/03/18 12:59:06 +0000"
}
PUT /clouds/:id.json
Edits cloud settings. Returns Cloud object.
Required parameters
| parameters | attributes |
|---|---|
| id | ID of the Cloud object. |
Optional parameters
| parameters | attributes |
|---|---|
| name | Name of the cloud. |
| s3_videos_bucket | Name of your S3 bucket. |
| s3_private_access | Specify if your files are public or private (private files need authorization url to access). Default is false. |
| aws_access_key | AWS access key. |
| aws_secret_key | AWS secret key. |
| priority | Value between 2 and 200 to prioritize jobs on your account. Cloud with lower number is first in processing queue. Default is 99`. |
Notifications
Example request
notif = Panda.get("/notifications.json")
puts(JSON.pretty_generate(notif))
# Simple API
notif = panda.notifications.get()
print(notif.to_json(indent=2))

# REST API
notif = panda.get("/notifications.json")
parsed = json.loads(notif)
print(json.dumps(parsed, indent=2))
notifications, err := manager.Notifications()
if err != nil {
  panic(err)
}
pretty.Println(notifications)
Example response
{
  "url": "null",
  "events": {
    "video_created": false,
    "video_encoded": false,
    "encoding_progress": false,
    "encoding_completed": false
  },
  "delay": 10
}
GET /notifications.json
Returns a Notifiactions object.
Example request
require 'json'

# REST API
notif = Panda.put("/notifications.json", {
  :events => {
    :video_created => "true",
    :video_encoded => "true",
    :encoding_progress => "true",
    :encoding_completed => "true"
  }
})
puts(JSON.pretty_generate(notif))
# Simple API
notif = panda.notifications.get()
notif["events"] = {
    "video_created": True,
    "video_encoded": False,
    "encoding_progress": True,
    "encoding_completed": True,
}
notif = notif.save()
print(notif.to_json(indent=2))

# REST API
notif = panda.put("/notifications.json", {
    "events": {
        "video_created": "true",
        "video_encoded": "false",
        "encoding_progress": "true",
        "encoding_completed": "true",
    }
})
parsed = json.loads(notif)
print(json.dumps(parsed, indent=2))
notification := panda.Notification{
URL: "www.example.com",
Events: panda.Events{
VideoEncoded: true,
},
}
if err := manager.Update(¬ification); err != nil {
panic(err)
}
Example response
{
  "url": "https://example.com/panda_notification",
  "events": {
    "video_created": false,
    "video_encoded": true,
    "encoding_progress": false,
    "encoding_completed": false
  },
  "delay": 10
}
PUT /notifications.json
Edits your notifications settings. Return Notifications object.
| parameters | attributes |
|---|---|
| url | url where to send notifications |
| delay | notification delay |
| encoding_completed | notify when encoding has been completed |
| encoding_progress | notify when encoding started |
| video_created | notify when video has been created |
| video_encoded | notify when all encodings have been completed |
API Errors
When there is an issue with a request, Telestream Cloud will return the appropriate HTTP status code, along with a JSON object containing the error name and a message. (500 status returns an empty body). For more information on HTTP status codes, see https://en.wikipedia.org/wiki/List_of_HTTP_status_codes
500 InternalError
When there is an internal error a 500 status will be returned along with additional information in the message. Whenever a 500 error occurs our technical team is notified of the issue and will investigate the root of the problem immediately. If your experience a recurring issue, please submit a support ticket to our support
Example response
status: 400
{
  "error":"BadRequest",
  "message":"Currently only .json is supported as a format"
}
status: 400
{
  "error":"BadRequest",
  "message":"All required parameters were not supplied: access_key, signature, timestamp"
}
400 BadRequest
This error will be returned in two cases. Either because you have requested a response format that is not supported (currently only JSON is supported, so all urls must end in .json), or you have not submitted all of the required parameters to a method.
Example response
status: 400
{
  "error":"RecordInvalid",
  "message":"Name has already been taken"
}
400 RecordInvalid
If the record you have sent is invalid (for example Profile object you have sent) this response will be returned.
Example response
status: 400
{
  "error":"UrlInvalid",
  "message":"The URL is not valid"
}
400 UrlInvalid
This error will be returned if the url you have sent to Telestream Cloud was invalid.
Example response
status: 401
{
  "error":"NotAuthorized",
  "message":"Signatures do not match"
}
status: 401
{
  "error":"NotAuthorized",
  "message":"Signatures expired"
}
401 NotAuthorized
When the signature parameter of a request is not correct, the server returns a status code 401 and a descriptive message. If you receive this error please ensure that you are constructing and encoding the signature parameter as described in the API Authentication section below.
If you receive a Signatures expired message, that means your clock is out of sync. You can maintain the system time in synchronization with time servers using ntpd.
Example response
status: 401
{
  "error":"S3AccessManagerError",
  "message":"Granting access to s3 bucket failed."
}
401 S3AccessManagerError
This error will be returned if Telestream Cloud can’t grant access to bucket using provided S3 credentials.
Example response
status: 401
{
  "error":"GCSAccessManagerError",
  "message":"Granting access to GCS bucket failed."
}
401 GCSAccessManagerError
This error will be returned if Telestream Cloud can’t grant access to bucket using provided GCS credentials.
Example response
status: 403
{
  "error":"Forbidden",
  "message":"Account with access key abcdefgh is disabled."
}
403 Forbidden
This error will be returned if you do not have access to requested operation, for example if your account is disabled.
Example response (example)
status: 404
{
  "error":"RecordNotFound",
  "message":"Couldn't find Video with ID=X"
}
404 RecordNotFound
A record with the id supplied could not be found.
Example response
status: 413
{
  "error":"FileSizeLimitExceeded",
  "message":"File size limit for this account is set to 10485760 bytes"
}
413 FileSizeLimitExceeded
If you attempt to upload a file > 10MB with a sandbox account, the following error will be returned.
Example response
status: 415
{
  "error":"FormatNotRecognised",
  "message":"Video data in file not recognized"
}
415 FormatNotRecognised
This error will be returned if Telestream Cloud can’t recognize format of the video sent.
Error classes and Error messages
Encoding and Video have 2 special attributes when their status is set to ‘fail’
| parameters | description |
|---|---|
| error_class | Helps you figure out what happened and what to do next. |
| error_message | Gives you a more descriptive message of the error |
The following table lists all possible error classes:
S3ErrorWhenever the system try to access your bucket and gets a bad response from S3.
GCSErrorWhenever the system try to access your bucket and gets a bad response from Google Cloud Storage.
CFErrorWhenever the system try to access your container and gets a bad response from Rackspace Cloud Files.
FTPErrorWhenever the system try to access your server and gets a bad response from it.
DownloadFailedTelestream Cloud was not able to download the file from source_url.
FormatNotRecognisedYour file is not a video or audio file valid.
VideoStatusInvalidThe original video is in error state and can not be processed. Check the videos error to know the reason (only applied for encodings).
FileNotFoundYour original video file doesn’t exist on S3.
CommandInvalidThe command of your custom profile is not correct. You should take a look at your encoding logfile.
HLSVariantsNotFoundNo HLS variants were found when creating HLS variants playlist.
EncodingErrorThe encoding has failed. You should take a look at your encoding logfile.
UnexpectedErrorError is not expected from the system we will look at it.
Storage
Telestream Cloud supports multiple storage providers to better suits your needs.
Amazon Simple Storage (S3)
Telestream Cloud uses S3 to store encoded video files so first of all you should signup for an Amazon Web Service account.
Create AWS account
Get Amazon AWS Account
Go to https://aws.amazon.com and follow the instruction in
Sign Up.Signup for S3
Once your AWS account has been created, go to
Amazon Simple Storage Service (S3)in the management console and sign up for the service.Grab your credentials
Go to IAM Users settings (Services -> IAM -> Users) and create a new user for Telestream Cloud. Then copy the generated user credentials (
Access Key IDandSecret Access Key, you will later need them to create a Telestream Cloud cloud). Now you will need to give Telestream Cloud permissions to create new clouds and upload files to the newly created user. Find the user in IAM settings and clickAttach User Policy. You will have to select appropriate user policy - either choose one of the predefined policies to let Telestream Cloud in (Amazon S3 Full Access, more permissive likePower User Accesswould work but are not needed), or create a custom policy.
You are now ready to create a Telestream Cloud !
{
  "Version": "2008-10-17",
  "Id": "PandaStreamBucketPolicy",
  "Statement": [
    {
      "Sid": "Stmt1344015889221",
      "Effect": "Allow",
      "Principal": {
        "AWS": "arn:aws:iam::078992246105:root"
      },
      "Action": [
        "s3:AbortMultipartUpload",
        "s3:GetObjectAcl",
        "s3:DeleteObject",
        "s3:GetObject",
        "s3:PutObjectAcl",
        "s3:ListMultipartUploadParts",
        "s3:PutObject"
      ],
      "Resource": "arn:aws:s3:::YOUR-BUCKET/*"
    },
    {
      "Sid": "Stmt1344015889221",
      "Effect": "Allow",
      "Principal": {
        "AWS": "arn:aws:iam::078992246105:root"
      },
      "Action": [
        "s3:GetBucketAcl",
        "s3:ListBucket",
        "s3:ListBucketMultipartUploads",
        "s3:GetBucketLocation"
      ],
      "Resource": "arn:aws:s3:::YOUR-BUCKET"
    }
  ]
}
Limit Telestream Cloud’s access on your bucket
By default Telestream Cloud only has access to the bucket. If you want to further restrict what Telestream Cloud can do, you can use a policy file like the one shown below. This example contains the minimum set of operations that Telestream Cloud needs for encoding and management.
In your AWS Console, S3, Properties, there is an “Edit bucket policy” button. Replace “YOUR-BUCKET” in the following text with your bucket name and paste it in the box. When done, you can remove the “pandastream” user in the list and save.
Create an IAM user for Telestream Cloud
If you don’t want to enter your master AWS credentials when creating a new Cloud, here is an alternative method.
NOTE: Telestream Cloud NEVER stores your AWS credentials. We only use them to create, identify and authorise your S3 bucket to be used by Telestream Cloud.
Amazon allows you to create restricted users called IAM. Instead of giving your master AWS credentials you can create an IAM user with just the permissions that Telestream Cloud needs to authorise the bucket and feed these credentials to Telestream Cloud when creating a new Cloud. For more informations on IAM have a look at Amazon’s documentation here: https://console.aws.amazon.com/iam
Policy statement
{
  "Statement": [
    {
      "Sid": "StmtXXXXXXXXX",
      "Action": [
        "s3:GetBucketAcl",
        "s3:GetBucketLocation",
        "s3:PutBucketAcl"
      ],
      "Effect": "Allow",
      "Resource": [
        "arn:aws:s3:::*"
      ]
    }
  ]
}
Create the user
To ensure that your user will be usable by Telestream Cloud, you need to attach some policies to this user.
- Select your user and click on
Attach user Policy(You can attach the policy directly to the group if you prefer)

- Select
Policy Generator->Select

- Select
Effect=>Allow,AWS Service=>Amazon S3 - Click on
Actionand tick the following options:GetBucketAcl,PutBucketAcl,GetBucketLocation
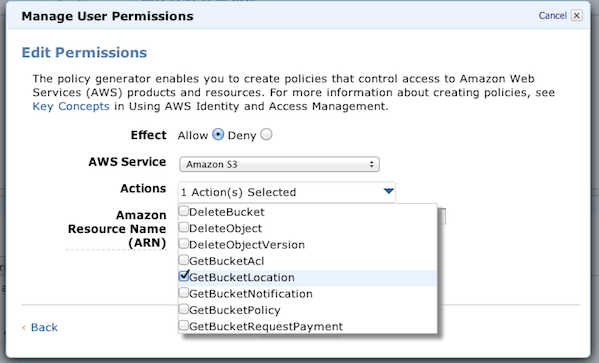
- Insert in the resource field:
arn:aws:s3:::bucket-name/*if you want this policy to be applied to a specific bucket orarn:aws:s3:::*for any bucket of your account. - Click on
Add Statementand thenContinue. - Apply your policy.
Google Cloud Storage (GCS)
To use Google Cloud Storage with Telestream Cloud, you should sign up for a GCS account to allow Telestream Cloud store encoded video files.
Create GCS account
Go to Google Developers Console and follow the sign up instructions. If you don’t have Google account, you will be prompted to create one.
Once signed in create project that you wish to activate GCS for
Enable Google Cloud Storage service while in the project select
API’s & AUTHin the left sidebar in the APIs list click button next to Google Cloud Storage to turn it onIn the project Settings click
Enable billingand you will be guided through the processTo be able to create buckets in Telestream Cloud you will need your Access Key and Secret
To obtain
Access Key & Secret: Go to your project’sStoragepage and underCloud StorageselectStorage accessfrom the left menu and then clickInteroperabilitytab on top. Now you may need to clickEnable Interoperability accessbutton to enable it. When you do it you should see yourAccess Key & Secret.
You are now ready to create a Telestream Cloud with Google Cloud Storage!
Rackspace Cloud Files (CF)
Before storing encoded video files with Rackspace you should sign-up for an CloudFiles account if you don’t have one yet.
Create CloudFiles account
Get RackSpace account Go to Cloud Files page and follow the sign-up process.
Create container (optional) Once signed in select Files in top menu and create container (either private or public).
Grab your credentials In your Cloud Control Panel you’ll find your username and API key in Account Settings.
Get your Temp URL token You can either create Temp URL token yourself through API - see how - or let us generate one for you while creating a new encoding cloud using Rackspace storage. You can use the Temporary URL feature (TempURL) to create limited-time Internet addresses that allow limited access to your Cloud Files account. Using TempURL, you can allow others to retrieve objects from or place objects in your Cloud Files account for a specified amount of time. After the specified amount of time expires, access to the account with the TempURL is denied.
You are now ready to create a Telestream Cloud !
FTP Storage (FTP)
If you prefer using your own infrastructure you may set up Telestream Cloud to store encoded files on FTP server.
Setting up FTP with Telestream Cloud
Log in to your Telestream Cloud account
Click
Create new cloudon your dashboard InCreate new cloudform select FTP Server as storage optionEnter your credentials Assuming you already have FTP account prepared, just enter host, port (default 21), username, pass and define folder where the files should be stored.
Your cloud with FTP storage is ready to use!
Aspera Enterprise Server Storage (FASP)
If you prefer using your own infrastructure you may set up Telestream Cloud to store encoded files on your Aspera Enterprise Server.
Setting up FASP with Telestream Cloud
Log in to your Telestream Cloud account
Click Add Factory on your dashboard In Storage Options form select Aspera Enterprise Server
Enter your credentials Enter host, username, password and bucket or folder where the files should be stored.
Your Factory with Aspera Enterprise Server storage is ready to use!
Profiles
Presets
Encoding profile presets
Telestream Cloud provides several encoding profile presets which make it easy to setup the correct output formats for your videos.
To manage your profiles
- Log into your Telestream Cloud Dashboard
- Select your cloud
- Click on the
ProfilesTab - Click
Add profileand you’ll be able to select from one of the recommended presets.
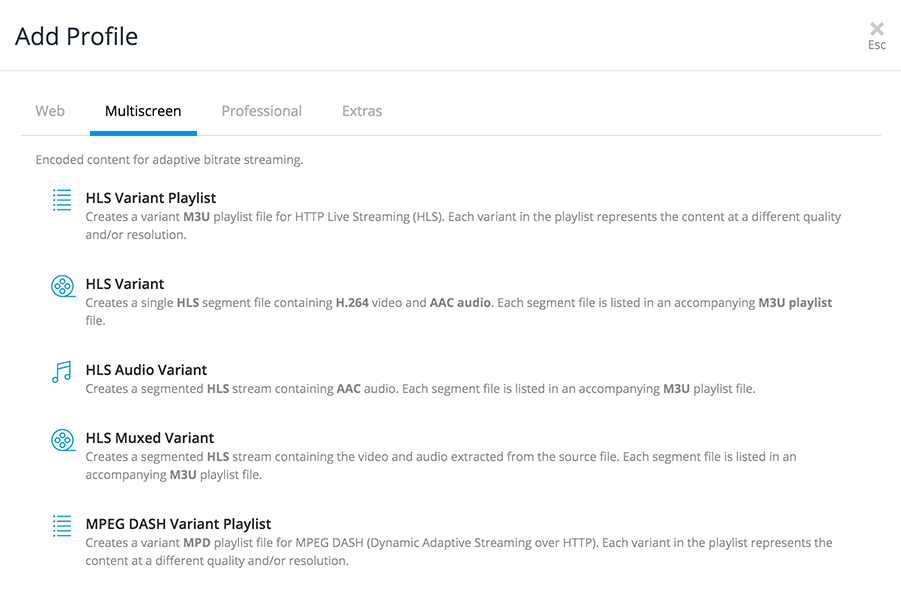
Available presets
Below you’ll find details about the presets available:
MP4 (H.265)
H.265 video with AAC audio for playback on HTML5 browsers, desktop players, Flash, iPhone (3GS and above) and iPad. Currently it’s premium feature.
| Quality | Standard |
|---|---|
| preset_name | h265 |
| h264 profile | high |
| video bitrate | 500kbps |
| audio bitrate | 128kbps |
| resolution | 640x480 |
MP4 (H.264)
H.264 video with AAC audio for playback on HTML5 browsers, desktop players, Flash, iPhone (3GS and above) and iPad. Use H264 baseline to support most of phones like first iPhone’s and Blackberry’s.
| Quality | Standard | High |
|---|---|---|
| preset_name | h264 | h264.hi |
| h264 profile | high | high |
| video bitrate | 500kbps | 1000kbps |
| audio bitrate | 128kbps | 128kbps |
| resolution | 640x480 | 1280x720 |
WebM (VP8)
VP8 video with Ogg Vorbis audio for playback in HTML5 compatible browsers.
| Quality | Standard | High |
|---|---|---|
| preset_name | webm | webm.hi |
| video bitrate | 500kbps | 1000kbps |
| audio bitrate | 128kbps | 128kbps |
| resolution | 640x480 | 1280x720 |
OGG (Theora)
Theora video with Ogg Vorbis audio for playback in HTML5 compatible browsers.
| Quality | Standard | High |
|---|---|---|
| preset_name | ogg | ogg.hi |
| video bitrate | 500kbps | 1000kbps |
| audio bitrate | 128kbps | 128kbps |
| resolution | 640x480 | 1280x720 |
HTTP Live Streaming (iOS Adaptive Streaming)
# Sub streams
Panda::Profile.create!({
  :name => "hls.iphone.400k"
  :preset_name => "hls.variant",
  :video_bitrate => 400
})
Panda::Profile.create!({
  :name => "hls.iphone.600k"
  :preset_name => "hls.variant",
  :video_bitrate => 600
})
Panda::Profile.create!({
  :name => "hls.ipad.1200k"
  :preset_name => "hls.variant",
  :video_bitrate => 1200
})
Panda::Profile.create!({
  :name => "hls.audio"
  :preset_name => "hls.variant.audio",
})

# iPhone and iPad Playlist
Panda::Profile.create!({
  :name => "iphone",
  :preset_name => "hls.variant.playlist",
  :variants => "hls.iphone*,hls.audio"
})
Panda::Profile.create!({
  :name => "ipad",
  :preset_name => "hls.variant.playlist",
  :variants => "hls.iphone*,hls.ipad*,hls.audio"
})
Special multi-bitrate segmented video for streaming to Apple devices.
Create a Master playlist profile that will list all sub-streams into one file.
| Quality | HLS Playlist |
|---|---|
| preset_name | hls.variant.playlist |
| variants | hls.* |
Then create a profile for each sub-stream of your Master Playlist. Each profile sub-stream (EXT-X-STREAM-INF) contains RESOLUTION, BANDWIDTH tags to help the client to choose an appropriate stream.
iOS devices will streams the best variant depending on the quality of the phone signal. See Apple’s recommendation for more details.
| Quality | HLS | HLS Audio Only | HLS Muxer |
|---|---|---|---|
| preset_name | hls.variant | hls.variant.audio | hls.muxer |
| video bitrate | 500kbps | - | - |
| audio bitrate | 56kbps | 56kbps | - |
| resolution | 640x480 | - | - |
You can create different playlists (one for iPhone one for iPad). Only the profiles with their names matching the variant attribute will be added to the playlist.
HSS (Microsoft Smooth Streaming)
| Quality | HSS |
|---|---|
| preset_name | hss |
| video bitrate | 2400kbps, 600kbps, 300kbps, 120kbps |
| audio bitrate | 128kbps |
| resolution | 640x480 |
Microsoft Smooth Streaming preset.
The default extension name setting, “.tar”, causes packing output files (.ismv, .ismc, .ism) into a single tar archive. This value can also be changed into a “.ism” one in order to disable this feature. In that case all files will be uploaded separately into a cloud and only .ism manifest file will be available for download through the API.
The default video bitrate setting produces segments with bitrates of 2400k, 600k, 300k and 120k. If you insert custom value, your output will consist of segments having bitrate equal to provided one, ½, ¼ and 1/8 of it.
MPEG DASH
| Quality | MPEG DASH |
|---|---|
| preset_name | dash |
| video bitrate | 2400kbps, 600kbps, 300kbps, 120kbps |
| audio bitrate | 128kbps |
| resolution | 640x480 |
The default extension name setting, “.tar”, causes packing output files (.mp4, .mpd) into a single tar archive. This value can also be changed into a “.mpd” one in order to disable this feature. In that case all files will be uploaded separately into a cloud and only .mpd manifest file will be available for download through the API.
The default video bitrate setting produces segments with bitrates of 2400k, 600k, 300k and 120k. If you insert custom value, your output will consist of segments having bitrate equal to provided one, ½, ¼ and 1/8 of it.
MP3
MP3 audio preset.
| Quality | MP3 |
|---|---|
| preset_name | mp3 |
| audio bitrate | 192kbps |
M4A (AAC)
MP4 audio preset.
| Quality | M4A (AAC) |
|---|---|
| preset_name | aac |
| audio bitrate | 192kbps |
OGA (Vorbis)
Ogg Vorbis audio preset.
| Quality | OGA (Vorbis) |
|---|---|
| preset_name | vorbis |
| audio bitrate | 192kbps |
Thumbnail
Special preset for creating thumbnails from video.
| Quality | Thumbnail |
|---|---|
| preset_name | thumbnail |
Ruby example
Panda::Profile.create!({
  :preset_name => "h264", # A valid preset name, as per the tables above
  :name => "my-h264", # Unique name for this profile
  :h264_crf => 23,
  :h264_profile => "baseline",
  :h264_level => "3.0",
  :width => "480",
  :height => "320"
})
Add an H264 profile
Telestream Cloud gives you complete control of presets using the API and the available libraries. For this, simply pass the preset_name attribute instead of the command attribute.
Ruby example
Panda::Profile.create!({
  :name => "h264",
  :preset_name => "h264",
  :width => 480,
  :height => 320,
  :watermark_url => "https://cloud.telestream.com/images/cloud-logo.png",
  :watermark_bottom => 5,
  :watermark_right => 5
})
Add Watermarking
You may want to add watermarking to your encodings. Use the api to set the url and the position of a remote image to use as a watermark.
Ruby example
Panda::Profile.create!({
  :preset_name => "h264",
  ....
  :frame_count => 5
})
Create Thumbnails
You have two ways of creating thumbnails.
- Each encodings create 7 screenshots by default. They are evenly spaced, captured directly from the encoding output, which means they have exactly the same dimensions and quality as your encoding.
You can update the size of the capture set using the
frame_countattribute.
Screenshots will be generated and uploaded to the S3 bucket with the name using the following convention: $path$_$screenshot_number$.jpg e.g. (my-path/2f8760b7e0d4c7dbe609b5872be9bc3b_4.jpg).
Ruby example
Panda::Profile.create!({
  :preset_name => "thumbnail",
  ....
  :extname => '.jpg', # or .png
  :frame_interval => "300f",
  :width => 90,
  :height => 60,
})
- You can either create a Thumbnail profile. Thumbnails are performed directly on the original video. You can modify the format, size, the aspect mode and the rate.
The resulting encoding will have all the thumbnails listed inside the files attribute
Ruby example
Panda::Profile.create!({
  # h264 profile
  :preset_name => "h264",

  # sets your profile name to h264
  :name => "h264",

  # 2 pass encoding
  :two_pass => true,

  # 30 fps
  :fps => 30,

  # mp4 format and .mp4 extname
  :extname => ".mp4"

  # 48k sample rate
  :audio_sample_rate => 48000,

  # Resolution 1080x720
  :height => 720,
  :width => 1080,

  # set the s3 destination
  :path_format => "my/path/:id",

  # don't upscale the video if the input is smaller than your profile resolution
  :upscale => false,

  # starts the clip after 10 seconds
  :clip_offset => "00:00:10",

  # Cut the clip after 20 minutes
  :clip_length => "00:20:00",

  # Keep aspect ratio
  :aspect_mode => 'letterbox',

  # Bitrates
  :video_bitrate => 2200,
  :audio_bitrate => 128,
})
Complete settings
You can set numerous of options to make your encoding just right.
FFmpeg Neckbeard
Telestream Cloud provides complete control over the commands used to convert video. You can log in to your Panda Dashboard and choose from our presets, or you can use the API to access the bare metal.
Stacks
As ffmpeg API changes, we can’t always update ffmeg without breaking your commands. That’s where presets become handy. To make sure your commands are backward compatible with the encoding API and ffmpeg’s API, we are using separate stacks of tools. The default stack is corepack-1. There is also corepack-2 and corepack-3. Corepack-1 will be deprecated soon and replaced by corepack-2. However, all profiles created with the previous stack will continue to work.
If you use API to create your profiles and want to stay on the old stack, make sure you specify ‘stack’ => 'corepack-1’. You can find the 'corepack-1’ docs here
We highly recommend to switch to presets or to the newest stack (corepack-3). It improves encoding/decoding speed and formats/codecs support.
API
All of the fields below are required when creating an advanced profile.
| parameters | attributes |
|---|---|
| extname | File extension, beginning with ’.’, of the output video. |
| command | Video conversion command (in most cases an ffmpeg command). |
| name | Which is a unique name inside your cloud to reference your profile. |
Telestream Cloud provides full access to a suite of powerful video conversion tools. These tools can be used together in one profile to output a variety of formats.
To execute multiple commands in one profile, you must separate each with a \n (newline) or ; (semicolon).
Telestream Cloud provides a few api tokens you can use in your commands:
| parameters | attributes |
|---|---|
| $input_file$ | input filename |
| $output_file$ | output filename |
| $width$ | width defined in your profile |
| $height$ | height defined in your profile |
| $record_id$ | encoding ID |
| $filters$ | scale your video considering the aspect mode and resolution attributes of your profile. |
| $audio_sample_rate$ | audio sample rate |
| $audio_channels$ | audio channels (default is copy) |
| $audio_bitrate$ | audio_bitrate |
| $video_quality$ | video bitrate or h264 crf |
| $video_bitrate$ | video_bitrate only |
| $max_audio_bitrate$ | audio bitrate threshold |
| $max_video_bitrate$ | video bitrate threshold |
| $fps$ | frame rate (default is copy) |
| $clip$ | subset of the video to be encoded |
H264 specific tokens
| parameters | attributes |
|---|---|
| $h264_profile$ | h264 profile (baseline, main, high) |
| $h264_level$ | h264 level (1.3, 3.0, 3.1, …) |
Examples
Ruby example
Panda::Profile.create!({
  :stack => "corepack-3",
  :name => "h264.SD",
  :width => 480,
  :height => 320,
  :h264_crf => 23,
  :audio_bitrate => 128,
  :extname => ".mp4",
  :audio_sample_rate => 44100,
  :keyframe_interval => 250,
  :command => "ffmpeg -i $input_file$ -threads 0 -c:a libfaac -c:v libx264 -preset medium $video_quality$ $audio_bitrate$ $audio_sample_rate$ $keyframes$ $fps$ -y video_tmp_noqt.mp4\nqt-faststart video_tmp_noqt.mp4 $output_file$"
})
PHP example
<?php
$panda->post('/profiles.json', array(
    'stack' => "corepack-3",
    'name' => "h264.SD",
    'width' => 480,
    'height' => 320,
    'h264_crf' => 23,
    'audio_bitrate' => 128,
    'extname' => ".mp4",
    'audio_sample_rate' => 44100,
    'keyframe_interval' => 250,
    'command' => 'ffmpeg -i $input_file$ -threads 0 -c:a libfaac -c:v libx264 -preset medium $video_quality$ $audio_bitrate$ $audio_sample_rate$ $keyframes$ $fps$ -y video_tmp_noqt.mp4\nqt-faststart video_tmp_noqt.mp4 $output_file$'
));
?>
Let’s create a custom h.264 profile.
You may not find a preset for your exactly need but the following examples should help you to encode videos into some popular formats.
FLV
Panda::Profile.create!({
  :stack => "corepack-3",
  :name => "flv",
  :width => 480,
  :height => 320,
  :video_bitrate => 500,
  :audio_bitrate => 128,
  :extname => ".flv",
  :command => "ffmpeg -i $input_file$ -threads 0 $audio_sample_rate$ $video_bitrate$ $audio_bitrate$ $fps$ $filters$ -y $output_file$"
})
AVI
Panda::Profile.create!({
  :stack => "corepack-3",
  :name => "avi",
  :width => 480,
  :height => 320,
  :video_bitrate => 500,
  :audio_bitrate => 128,
  :extname => ".avi",
  :command => "ffmpeg -i $input_file$ -threads 0 -c:v msmpeg4 -c:a libmp3lame -tag:v MP43 $audio_sample_rate$ $audio_sample_rate$ $video_bitrate$ $audio_bitrate$ $fps$ $filters$ -y $output_file$"
})
WMV
Panda::Profile.create!({
  :stack => "corepack-3",
  :name => "wmv",
  :width => 480,
  :height => 320,
  :video_bitrate => 500,
  :audio_bitrate => 128,
  :extname => ".wmv",
  :command => "ffmpeg -i $input_file$ -threads 0 -c:v wmv2 -c:a wmav2 $audio_sample_rate$ $video_bitrate$ $audio_bitrate$ $fps$ $filters$ -y $output_file$"
})
OGG - 2 pass
Panda::Profile.create!({
    :stack => "corepack-3",
    :name => "ogg.2pass",
    :width => 480,
    :height => 320,
    :video_bitrate => 500,
    :audio_bitrate => 128,
    :extname => ".ogg",
    :command => "ffmpeg -i $input_file$ -f ogg -pass 1 -threads 0 -c:v libtheora -c:a libvorbis $audio_sample_rate$ $video_bitrate$ $audio_bitrate$ $fps$ $filters$ -y /dev/null\nffmpeg -i $input_file$ -f ogg -pass 2 -threads 0 -c:v libtheora -c:a libvorbis $audio_sample_rate$ $video_bitrate$ $audio_bitrate$ $fps$ $filters$ -y $output_file$"
  })
Our presets support two pass encoding but if you need the command, here is the way to do it:
Available conversion tools
Here is the list of conversion tools available in Telestream Cloud.
FFmpeg
FFmpeg is a complete, cross-platform solution to record, convert and stream audio and video. It includes libavcodec - the leading audio/video codec library.
We provide a recent version of ffmpeg, compiled from the git repository with as many codecs as we could get our hands on (See full list of Supported File Formats and Codecs).
command name: ffmpeg
command version: Ffmpeg 0.10
Lame
See http://lame.sourceforge.net/
LAME is a high quality MPEG Audio Layer III (MP3) encoder.
command name: lame
command version: Lame 3.99
MEncoder
An other video encoder built from the same code as MPlayer.
command name: mencoder
Segmenter
Segmenter divides input file into smaller parts for HLS playlists.
command name: segmenter
Manifester
Manifester is a tool to create m3u8 manifest file.
command name: manifester
QtFaststart
See https://multimedia.cx/eggs/improving-qt-faststart/
Moves the moov atom in front of the data to improve network streaming.
command name: qt-faststart
QtRotate
See https://github.com/danielgtaylor/qtrotate
QtRotate is a tool to work with rotated files.
command name: qtrotate
Yamdi
See http://yamdi.sourceforge.net/
Yamdi is a metadata injector for FLV files.
command name: yamdi
MP4Box
See https://gpac.wp.mines-telecom.fr/mp4box/
Mp4Box is a tool for manipulating multimedia files.
command name: MP4Box
Telestream Cloud Uploader
The Telestream Cloud uploader allows you to upload videos from your web application to Telestream Cloud. It’s an HTML5 uploader solution with Flash fallback.
What’s new
Here is a couple of features that forced us to rewrite the uploader from scratch.
- Library agnostic.
- Better code base and a better api.
- Resumable uploader. We built a new upload backend to handle the resume of your upload if you go offline. This is great for big files.
- Upload queueing. You can easily add multiple videos on a single page.
- Consistent UI between HTML5 and FLASH.
Upload Strategies
The Telestream Cloud Uploader will use HTML5 upload if the browser supports it, and will fall back to Flash upload if necessary. Flash doesn’t have resumable capabilities and will upload your content as a MultiPart stream.
| Browser | Upload Supported? | Method Used |
|---|---|---|
| Opera | Yes | HTML5 |
| Safari | Yes | HTML5 |
| Chrome | Yes | HTML5 |
| Firefox >= 3.5 | Yes | HTML5 |
| IE 6-9 | Yes | Flash |
| Others | Yes | Flash |
Library installation
In order to start using the uploader, you need to paste the link to the CDN hosted minified version of the uploader library. You can keep up to date automatically with patch releases by linking to a minor version. The current stable version is 2.3. To do so, simply include the following declaration in your page:
<script src="//cdn.pandastream.com/u/2.3/panda-uploader.min.js"></script>
Initialization
By invoking panda.uploader.init(options) with a set of configuration options, you will initialize the Telestream Cloud uploader
Here is the list of options available at the time of initialization:
| parameters | attributes |
|---|---|
| buttonId | Dom Id of the styled Browsing button.( required!, it should be a <div> ) |
| authorizeUrl | Route of the authentication request.( example: /panda/authorize_upload ) |
| autoStart | Upload starts right after the user select a file.( true/false, default: true ) |
| autoResume | Automatically resume the upload after you went offline.( true/false, default: true ) |
| resumeInterval | Interval in milliseconds before the upload gets resumed.( default: 5000 ) |
| allowSelectMultipleFiles | Allows you to add multiple files to the upload queue.( true/false, default: false ) |
| progressBarId | Dom id of the progress bar. |
| fileDropId | Dom id of the file drop zone. |
| fileUrlInputId | Dom id of the text input where url will be placed. |
| fileUrlButtonId | Dom id of submit button for fileUrlInputId. |
| maxFileSize | Maximun file size.( example: ‘10 MB’, valid: [K|M|G]B, default: null ) |
| confirmBeforeUnload | Alert the user that an upload is processing.( true/false, default: true ) |
| type | Forces the uploader type.( html/flash, default null ) |
| onQueue (files) | List of <files> added to the Queue. |
| onStart (file) | <file> starts uploading. |
| onProgress (file, percent) | <file> upload progress. |
| onSuccess (file, json) | The uploader has successfully uploaded <file> and returned a <json> object. |
| onError (file, text) | The uploader has failed uploading <file> and returned a response. |
| onComplete () | The upload queue has been completed. |
| onCancel (file) | <file> upload has been canceled. |
| onPause (file) | <file> upload has been paused due to connectivity issues. |
<Uploader> Object:
| parameters | attributes |
|---|---|
| type | Returns the uploader type (html5/flash). |
| setPayload (file, object) | Add extra variables to the payload. |
| setEnabled (bool) | Enable/Disable the uploader. |
| getQueuedFiles () | Returns the list of queued files. |
| start () | Start uploading next queued file. |
| cancel (file) | cancel <file> upload. |
<File> Objet:
| parameters | attributes |
|---|---|
| name | File name. |
| size | File size in Bytes. |
Upload authentication
Ruby example
# Using Rails and https://github.com/pandastream/panda_gem
# app/controllers/panda_controller.rb
class PandaController < ApplicationController
  def authorize_upload
    payload = JSON.parse(params['payload'])

    options = {
      profiles: "h264,webm",
      # payload: 'something',
      # path_format: ':video_id/:profile/play',
    }
    if payload['filename']
      url = '/videos/upload.json'
      options['file_name'] = payload['filename']
      options['file_size'] = payload['filesize']
    else
      url = "/videos.json"
      options['source_url'] = payload['fileurl']
    end

    upload = Panda.post(url, options)

    render :json => {:upload_url => upload['location']}
  end
end
Python example
# Using Django and https://github.com/pandastream/panda_client_python
# views.py
@csrf_exempt
def authorize_upload(request):
  params = json.loads(request.POST['payload'])

  options = {"profiles": "h264"}
  if params["filename"]:
    url = "/videos/upload.json"
    options["file_name"] = params["filename"]
    options["file_size"] = params["filesize"]
  else:
    url = "/videos.json"
    options["source_url"] = payload["fileurl"]

  upload = panda.post(url, options)

  auth = {"upload_url": json.loads(upload)["location"]}
  return HttpResponse(json.dumps(auth), mimetype='application/json')
PHP example
<?php
// authorize_upload.php
$payload = json_decode($_POST['payload']);

$filename = $payload->{'filename'};
$filesize = $payload->{'filesize'};
$fileurl = $payload->{'fileurl'};

$options = array('profiles' => 'h264');
if ($filename) {
  $url = '/videos/upload.json';
  $options['file_name'] => $filename;
  $options['file_size'] => $filesize;
} else {
  $url = '/videos.json';
  $options['source_url'] => $fileurl;
}

$upload = json_decode(@$panda->post($url, $options);

$response = array('upload_url' => $upload->location);

header('Content-Type: application/json');
echo json_encode($response);
?>
The authentication of your new upload occurs via an HTTP Request to a configurable authentication url when the file is ready to be uploaded. In the JavaScript Uploader the HTTP Request is executed via AJAX POST request.
The destination of the authentication request can be configured by setting the authorizeUrl param when calling panda.uploader.init.
The default is /panda/authorize_upload
A payload is then sent as a JSON encoded object in the body and can contain 2 sets of variables:
filesize,filename,content_typefileurl
These should be self-explanatory.
The api request to Telestream Cloud should include:
for /videos/upload.json endpoint file_name and file_size
for /videos.json endpoint source_url
Optionally, you can set:
| parameters | attributes |
|---|---|
| use_all_profiles: | (true / false) Default is false |
| profiles: | Comma-separated list of profile names.By default no encodings are created yet. |
| payload: | Arbitrary string stored along the Video object. |
| path_format: | Allows you to set the location inside your S3 Bucket.It should not include the file extention. |
More details on the api docs
The generated JSON should include:
| parameters | attributes |
|---|---|
| upload_url | Location where to upload the file |
| postprocess_url (optional) | When a file upload is complete, a request is made to this url to let your server know that the uploader finished uploading the file |
Simplest example
<form action="/path/to/action" id="new_video" method="POST">

  <input type="hidden" name="panda_video_id"/>

  <div id="browse-files">Choose file</div>

</form>
Uploader setup
var upl = panda.uploader.init({
  'buttonId': 'browse-files',
  'onProgress': function(file, percent) {
    console.log("progress", percent, "%");
  },
  'onSuccess': function(file, data) {
    $("#new_video")
      .find("[name=panda_video_id]")
        .val(data.id)
      .end()
      .submit();
  },
  'onError': function(file, message) {
    console.log("error", message);
  },
});
The following is the simplest working form that will upload a video:
In this example:
- Click on “Choose file”. You will be shown a file selection dialog.
- Select a file to upload.
- Wait for the upload to complete.
- After the upload completes, Telestream Cloud returns a unique ID that identifies your video. The form will finally be submitted so that your application can read this value and use it to reference the video later on.
var upl = panda.uploader.init({
  ...
  'onQueue': function(files) {
    $.each(files, function(i, file) {
      upl.setPayload(file, {'authenticity_token': AUTH_TOKEN});
    })
  },
}
If you need to, you can add some extra data to the payload alongside the ones mentioned above.
Additional features
Progress Bar and File Drop
<form action="/path/to/action" id="new_video" method="POST">

  <input type="hidden" name="panda_video_id"/>

  <div class='progress'><span id="progress-bar" class='bar'></span></div>

  <div id="file-drop">Drop files here</div>

  <div id="browse-files">Choose file</div>

</form>
Uploader setup
var upl = panda.uploader.init({
  ...
  'progressBarId': "progress-bar",
  'fileDropId': "file-drop",
});
The uploader comes with some handy handlers like Progress Bars and File Drop.
The uploader doesn’t come with any styling. Take a look at Twitter Bootstrap.
Resume an upload
var upl = panda.uploader.init({
  ...
  'autoResume': false,
  'onPause': function(){
    $("#notice").text("You went offline.");
  }
})

$("#resume-btn").click(function() {
  upl.start();
})
If you have been disconnected from the Internet while you were uploading a file you will be notified by the onPause callback.
It’s important to note that the Flash uploader doesn’t support this feature so the upload will fail.
By default, the uploader will setup a resume interval of 5 seconds.
You can also create a resume button.
To resume your uploading queue, just call the start method and your current upload will continue where it left off.
Abort an upload
$("#cancel-btn").click(function() {
  upl.cancel(file);
})
If you want to abort an upload that is currently taking place, use the cancel() function from the uploader instance:
An aborted upload is no longer resumable.
Upload file from another server
<form action="/path/to/action" id="new_video" method="POST">

  <input type="hidden" name="panda_video_id"/>

  <input id="file-url" type="text" placeholder="Type URL to file">
  <button id="file-url-send" type="button">Upload from URL</button>

  <div id="browse-files">Choose file</div>

</form>
Uploader setup
var upl = panda.uploader.init({
  ...
  'fileUrlInputId': "file-url"
  'fileUrlButtonId': "file-url-send"
});
You can also upload any publicly available video file just by submitting the URL of it.
Upload from URL in pure JavaScript
var upl = panda.uploader.init({
  ...
});

upl.uploadFromUrl("http://mysite/video.mp4", function (error) {
  // If something went wrong the error parameter will be passed to this callback function.
  // If error is undefined it means action ended with success.
});
You can also omit the HTML form part, and just call uploader method uploadFromUrl to achieve the same effect.
Ruby example
# app/controllers/panda_controller.rb
class PandaController < ApplicationController
  def authorize_upload
    ...
    render :json => {
      :upload_url => upload['location'],
      :postprocess_url => '/some/postprocess'
    }
  end
end
Python example
# views.py
def authorize_upload(request):
  ...
  auth = {
    "upload_url": json.loads(upload)["location"],
    "postprocess_url": '/some/postprocess',
  }

  return HttpResponse(json.dumps(auth), mimetype='application/json')
PHP example
<?php
// authorize_upload.php
$response = array(
  'upload_url' => $upload->location},
  'postprocess_url' => 'postprocess.php'
  );

header('Content-Type: application/json');
echo json_encode($response);
?>
Post processing
You might want to let your server know that the uploader finished uploading a file. This is quite useful when handling multiple uploads on a single web page.
To achieve this, you simply need to return the postprocess_url during the authentication handshake.
Ruby example
# app/controllers/some_controller.rb
class SomeController < ApplicationController
  def postprocess
    response = JSON.parse(params["upload_response"])
    render :json => { :id => "some-id" }
  end
end
Python example
# views.py
@csrf_exempt
def postprocess(request):
  response = json.loads(request.POST['upload_response'])
  return HttpResponse(json.dumps({"id": "some-id"}), mimetype='application/json')
PHP example
<?php
// postprocess.php

$response = json_decode($_POST['upload_response']);
header('Content-Type: application/json');
echo json_encode(array('id' => 'some-id'));
?>
Once the video is successfully uploaded to Telestream Cloud, your server will receive a POST request like this.
var upl = panda.uploader.init({
  ...
  'onSuccess': function(file, data) {
    console.log(data['id']); // 'some-id'
  }
})
The onSuccess callback will expose the data received from the postprocess request.
Guides
Upload API
Streaming upload using client libraries
# https://github.com/pandastream/panda_client_python#resumable-uploads
us = panda.upload_session("file.mp4", profiles="webm")

retry_count = 0
try:
    us.start()
except Exception as e:
    while retry_count < 5 and us.status != "success":
        try:
            time.sleep(5)
            us.resume()
        except Exception as e:
            retry_count += 1
# https://github.com/pandastream/panda_gem#resumable-upload
us = Panda::UploadSession.new("panda.mp4", profiles: "webm")

retry_count = 0
begin
  us.start()
rescue Exception => e
  while retru_count < 5 and us.status != "success"
    begin
      sleep(5)
      us.resume()
    rescue Exception => e
      retry_count += 1
    end
  end
end
Small multimedia files can be sent using POST request on “/videos.json” API endpoint. This will attempt to send te entire using a single request. The obvious drawback of this approach is lack of rich uploading features. You cannot stop and retry the process and in case of a connection failure you have to send the file from the beggining. That’s why it’s usually better for such files to use resumable upload features, which allows you to send files in chunks. If the connection fails, you can query Telestream Cloud for the range of file that has been succesfully sent so you can resume the process from that point onwards.
Telestream Cloud’s Upload API supports 2 ways of uploading a file: resumable (also known as streaming) and multipart upload. The first is a better choice when your environment allows you to do so. The seconds is the standard method for web browsers to send large files. Recent browsers now supports the first method too. Both methods are described in this document.
Instead of creating your own code, you can use session creating functionality offered by the Telestream Cloud libraries.
Create an upload session
->
POST /videos/upload.json
Host: api.pandastream.com
--
file_size     :     integer
file_name     :     string

<-
Status Code 201

"id"          :     integer
"location"    :     location to upload the video
Before uploading a new file, you need to create an upload session. This is normally done by making an ajax call request from your javascript uploader (with the file size and name) to your backend. The ajax request should return the location for the upload.
At this point, Telestream Cloud gives you a unique resource location to upload the file.
File upload using Streaming method
Protocol
->
PUT /<location>
"Content-Type: application/octet-stream"
"Content-Range: bytes RS-RE/L" [where RS=range start, RE=range end, L=file_size]
--

Body <BINARY>
<-
Status Code 200
--

Body <Video JSON>
If the file has been uploaded successfully, the original request is sent to the backend with the file and you receive the backend’s response. (R2=L-1)
If the Content-Range is missing, the whole file is expected to be sent.
The method can also be POST, as long as the Content-Type is application/octet-stream we can differentiate with the mulitpart upload.
<-
Status Code 204
Range: RS-RE
--

Body <empty>
If the file is incomplete, you get a response that lets you know the missing data (R2<L-1).
Example
->
PUT <location/>
Content-Length: 5
Content-Range: bytes 0-4/9

abcde

<-
Status: 204
Range: 0-4

<empty>
1st chunk:
->
PUT <location/>
Content-Length: 4
Content-Range: bytes 5-8/9

fghi

<-
Status: 200

<{"id":"12345"...}>
2nd Chunk:
Upload status
->
PUT /<location>
"Content-Range: bytes */L"                       [ where L=total file size ]
--

<-
Status Code 204
Range: RS-RE
--

Body <empty>
If the client connection broke, You need to query the server to know where it left the upload. In this case, send an empty request specifying Content-Range: bytes * and Content-Lenght: 0 in the headers.
Abort the upload
->
DELETE /<location>

<-
Status Code 200
--

Body <empty>
File upload using Multipart method
->
POST /<location>
"Content-Type: multipart/form-data"; boundary=----
--

Body <BINARY>

<-
Status Code 200
--

Body <Video JSON>
To POST data using an HTML <form> you will have to send the data within the parameter "file".
Client notes
Error handling
The client is expected to retry requests that fail with a status of 5xx or weren’t able to pass through at all. All 4xx errors are errors in the client’s implementation and should be treated accordingly.
Location handling
On each response you may receive a new Location that you need to follow in the subsequent requests. This is to leave us the flexibility of moving the upload to a different host. Please record the new location if it appears to have changed.
Content-Range
Here is the regexp to parse the range header: "^(\d+)-(\d+)$"
Notifications
Rather than polling Telestream Cloud to find when a video has finished encoding, Telestream Cloud allows you to provide a notification endpoint and subscribe to events occurring during the encoding process.
To manage your notifications, log into your Panda Dashboard, select your cloud and click on the Notifications tab.
Here you’ll be able to specify a url and select events you would like to receive.
One you’ve saved your notification settings, notifications will be sent for any new videos and encodings of this cloud.
Events
Telestream Cloud provides the following events:
Ruby example
{
  "event" => "video-created",
  "video_id" => '123234',
  "encoding_ids" => {0 => 'firstid', 1 => 'secondid'}
}
PHP example
$_POST["event"] // => "video-created"
$_POST["video_id"] // => '123234'
$_POST["encodings_ids"][0] // => 'firstid'
video-created
This is called once a video has downloaded (if a url was given), validated, and uploaded to your S3 bucket. The status will either be success or fail. An array of encoding ids is provided, although note that the encodings will not have been processed at this state.
After this notification is sent, a subsequent request can be used to fetch metadata of the input video.
Ruby example
{
  "event" => "video-encoded",
  "video_id" => "bfa6029038de24e4494f20a166700021",
  "encoding_ids" => {0 => 'firstid', 1 => 'secondid'}
}
video-encoded
This is called when all encodings for a video have been completed. Note that this may be returned multiple times if, for example, a new encoding is added for an existing video.
{
  "event" => "encoding-progress",
  "encoding_id" => 'firstid',
  "progress" => 23
}
encoding-progress
This is called approximately every 10s while an encoding is processing, and returns the percentage complete. Use with care since this will generate a lot of traffic!
{
  "event" => "encoding-complete",
  "encoding_id" => "bfa6029038de24e4494f20a166700021"
}
encoding-complete
This is called for each encoding when the encoding is done (or failed).
The post body contains encoding information.
Panda::Video.find(params['video_id']).status
=> 'success'
After receiving those IDs you can easily and securely retrieve the state of your videos/encoding by simply using your current library.
Integrate notifications
class PandaController < ApplicationController
  def notifications
    if params['event'] == 'video-encoded'
        video = Video.find_by_panda_video_id(video_id)
        if video
            UpdateVideoState.perform_async(video.id)
        else
            # might have been deleted
        end
    end
  end
end

class UpdateVideoState
  include Sidekiq::Worker

  def perform(id)
    video = Video.find(id)
    if video.panda_video.status == 'fail'
        # video failed to be uploaded to your bucket
    else
        h264e = video.panda_video.encodings['h264']
        if h264e.status == 'success'
            # save h264e.url in your models to avoid querying panda each time
        else # handle a failed job
            # h264e.error_class; h264e.error_message
            # a log file has been dumped in your bucket
        end
    end
  end
end
For each event you will receive a POST request, containing the event name (ex: encoding-complete) and some ids the videos or encodings having their status changed, as form data.
Telestream Cloud is expecting a 200 response from you. Otherwise it will retry the notification within an exponential interval of time and during 24 hours. The Initial notification delay field allows to select the initial waiting time in order to manipulate the number and frequency of retried notifications, for example in case of endpoint not being capable of serving large amounts of incoming requests and getting overloaded.
The following example shows a best practice for you to handle those notifications using Async workers. In this example we are going to use Sidekiq to handle async jobs.
Setup in development
Because your development machine is rarely accessible from the Internet, the notifications cannot be sent to you directly. At Telestream Cloud, we use ultrahook to give access to our local development machine to the Internet.
$ gem install ultrahook
# 3000 is the port of the local webserver
$ ultrahook foo 3000
  Authenticated as senvee
  Forwarding activated...
  http://foo.senvee.ultrahook.com -> http://localhost:3000
- Create a tunnel
- Now set the notification URL in your development cloud to http://foo.senvee.ultrahook.com
- Your local app starts receiving notification callbacks
Alternatively, if you just want to see what output Telestream Cloud is producing, create a new target on requestbin.com and set it up as the notification end-point. Postbin will record Telestream Cloud’s callbacks and let you see them trough their web interface.
AES-128 encryption for HLS
cipher = OpenSSL::Cipher::AES.new(128, :CBC)
cipher.encrypt
key = cipher.random_key
iv = cipher.random_iv
To use AES-128 HLS encryption, Telestream Cloud will require a 128 bit key, key url and 128 bit initialization vector. If you are willing to use your own key or initialization vector (iv), you can create them yourself.
There are two ways to create encrypted output using Telestream Cloud:
add
encryption_keyandencryption_key_urlto profile and send the videos withencryption_ivonlysend each video with
encryption_key,encryption_key_urlandencryption_iv.
Please note that if you decide to use the second option while the encryption_key and encryption_key_url are set for profile, Telestream Cloud will use those specified for the video object.
encoded_key = Base64.encode64(key).chomp
encoded_iv = Base64.encode64(iv).chomp
In order to use your generated key in the profile settings or for the video, you will have to first base64 encode it. Make sure to remove any newline characters at the end.
Profiles pipelining
pipeline = {
  "h264.1" => {},
  "h264.2" => {
    "h264.4" => {},
    "h264.5" => {
      "h264.7" => {}
    }
  },
  "h264.3" => {
    "h264.6" => {}
  }
}


Panda::Video.create!(
  :source_url => "SOURCE_URL_TO_FILE",
  :pipeline => pipeline.to_json
)
Profiles pipelining allows you to automatically create new video with set of profiles from your done encoding.
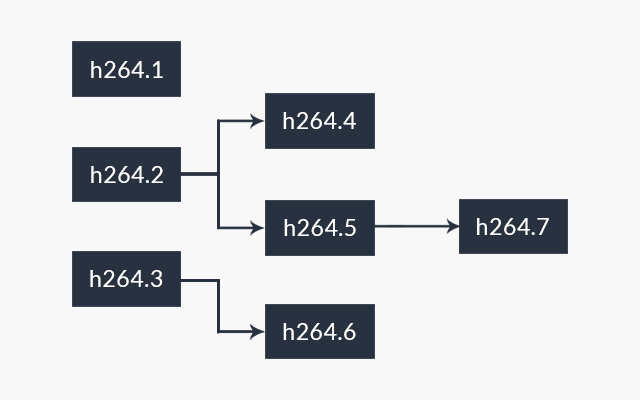
Image represents example flow of video. Using words uploaded video will be encoded with profiles: h264.1, h264.2, h264.3. Then encoding of h264.2 will be used to create new video with profiles h264.4 and h254.5, and so on. For describing pipelines Telestream Cloud is using JSON.
When encoding is done additional field derived_video_id will contain ID of the video created from this encoding.
All notifications related to a pipeline will contain initial_video_id (ID of the first video in the pipeline).
Player
Setting up your video player
Telestream Cloud gives you to flexibility to use the video player which suits you best. There are several great players available, below we explain the benefits of each and how to use them with Telestream Cloud.
HTML5 players
HTML5 is the new standard for embedding videos on the web. The New HTML5 video tag plays video natively in the user’s browser or device. If the browser or device doesn’t support the video tag, several HTML5 video players will automatically fallback to a Flash player.
There is an excellent section in Dive Into HTML5 which explains the new <video> in great detail. You might want to skip to the section about the markup.
There are a few ways to use HTML5 video. In the most basic form you can use a simple <video> tag to embed video. Using this method the video will work with the following:
- Firefox 3.5+
- Chrome
- Safari 3+
- Opera
- IE 9
- iPhone and iPad
To support older browsers, you can use a HTML5 video player which supports Flash player fallback. After the next section you’ll find details about several good players which support this.
For more details about embedding videos in your application please refer to the Ruby on Rails and PHP guides.
Basic video tag
Example <video> tag
<video id="movie" width="320" height="240" preload="none"
  poster="https://s3.amazonaws.com/YOUR_S3_BUCKET/ENCODING_ID_4.jpg" controls>
  <source src="https://s3.amazonaws.com/YOUR_S3_BUCKET/ENCODING_ID.mp4" type="video/mp4">
  <source src="https://s3.amazonaws.com/YOUR_S3_BUCKET/ENCODING_ID.ogg" type="video/ogg">
</video>
To support HTML5 video in most browsers there must be H.264 and OGG Theora versions of your videos (Firefox does not have support for H.264 and requires OGG Theora).
To enable H.264 (MP4) and Theora (OGG) in Telestream Cloud, simply head to your account, edit one of your encoding clouds and add enable them as presets. Once this is done, all videos uploaded will be encoded to these formats. See the Encoding Presets docs for more details about managing presets.
The simplest way to then embed your videos is using a basic <video> tag.
In the example you would need to replace VIDEO_ID with the ID of the video from Telestream Cloud, and then the YOUR_S3_BUCKET with the name of your S3 bucket.
JW Player for HTML5
There is now a HTML5 version of this popular player. JW Player for HTML5 supports theming and automatically falls back to the Flash version the browser doesn’t support HTML5 video. Full details about the player are here. The best place to start is by downloading the player and then reading the Embedding The Player instructions. Make sure you read the Multiple Sources section to see how to specify multiple formats.
Below is an example of embedding the player using Telestream Cloud:
<script type="text/javascript" src="/scripts/jquery.js"></script>
<script type="text/javascript" src="/scripts/jquery.jwplayer.js"></script>
First, place this code in the <head> of your page:
<video width="320" height="240" id="player" poster="https://s3.amazonaws.com/YOUR_S3_BUCKET/ENCODING_ID_4.jpg">
  <source src="https://s3.amazonaws.com/YOUR_S3_BUCKET/ENCODING_ID.mp4" type="video/mp4">
  <source src="https://s3.amazonaws.com/YOUR_S3_BUCKET/ENCODING_ID.ogv" type="video/ogg">
</video>

<script type="text/javascript">
  $('#player').jwplayer({
    flashplayer:'/files/player.swf',
    skin:'/files/skins/five/five.xml'
  });
</script>
Second, place this code where you want the video to appear:
FlareVideo
The FlareVideo a great HTML5 video player which has theming support with a seamless fallback to Flash.
Video JS
The Video JS player is another option for displaying HTML5 video. The player is very lightweight and will fallback to the Flash Flowplayer.
Flash Players
Example
<div id='mediaspace'>This text will be replaced</div>

<script type='text/javascript'>
  var so = new SWFObject('/player.swf','mpl',"VIDEO_WIDTH","VIDEO_HEIGHT",'9');
  so.addParam('allowfullscreen','true');
  so.addParam('allowscriptaccess','always');
  so.addParam('wmode','opaque');
  so.addVariable('file',"https://s3.amazonaws.com/YOUR_S3_BUCKET/ENCODING_ID.mp4");
  so.addVariable('image',"https://s3.amazonaws.com/YOUR_S3_BUCKET/ENCODING_ID_4.jpg");
  so.write('mediaspace');
</script>
Using a Flash video player is currently the most reliable way to embed video, and also allows you to easily add in advertising and other interactive features.
There are several options including JW Player and Flowplayer. The instructions below are for using JW Player.
First Download JW Player 5.1, unzip and copy player.swf swfobject.js and to you public directory.
You can keep the same controller code as above.
In your view insert your video player as the example shows.
Streaming
Video streaming with Amazon CloudFront
Assuming you are building a high-traffic website, you will want to have your videos streamed efficiently to your users. After encoding your videos with Telestream Cloud, you can stream them through a content delivery network.
By choosing to streaming your videos, users can skip to any point in the video without having to first wait for it to be downloaded as is the case with progressive download delivery.
You will already have an Amazon Web Services account account if you’ve signed up the S3 for storing videos. We recommend using Amazon’s CloudFront CDN.
CloudFront gives you two ways to deliver video content:
- Progressive Download
- Streaming (using RTMP)
The main difference between Streaming and Progressive Download is in how the data is received and stored by the end user.
You can find some documentation on Wikipedia
The document will cover setting up a video streaming. Progressive download is covered by the standard video player integration documentation.
Create a Streaming distribution
Adding Streaming is very easy. Let’s go through all the steps right now.
- First you need to sign in to Amazon and go to the CloudFront console
- Click on button
Create Distributionon the top-left corner

A new form will appear.

- Select Streaming as the delivery method
- Select your bucket in the list
- Adding CNAMEs will make the distribution URL nicer (optional)
- Select
enabled
It should look similar to this:
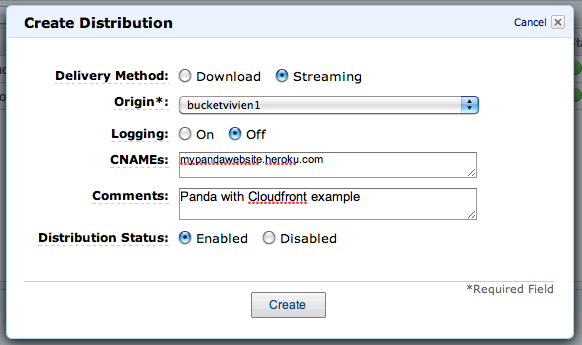
- Click on
create
Congrats, you now have a streaming distribution!
Play your videos
Example
<script type="text/javascript" src="swfobject.js"></script>
<script type="text/javascript"> swfobject.registerObject("player", "9.0.0", "/player.swf"); </script>
<object width='320' height='240' id='player'>
   <param name='movie' value='/player.swf'>
   <param name='allowfullscreen' value='true'>
   <param name='allowscriptaccess' value='always'>
   <param name='wmode' value='opaque'>
   <param name='flashvars' value='file=3ff851d2-d467-11de-87a8-00254bb33798.mp4&streamer=rtmp://s2zw4551q289e3.cloudfront.net/cfx/st&provider=rtmp'>
   <embed id='player'
           src='/player.swf'
           width='320'
           height='240'
           bgcolor='#ffffff'
           allowscriptaccess='always'
           allowfullscreen='true'
           flashvars='file=3ff851d2-d467-11de-87a8-00254bb33798.mp4&streamer=rtmp://s2zw4551q289e3.cloudfront.net/cfx/st&provider=rtmp'
    />
</object>
Before you begin streaming video, you will need to make sure you have a compatible encoding profile setup in your Telestream Cloud encoding cloud. CloudFront supports both FLV and MP4 streaming. We highly recommend using MP4 as the quality is far superior.
Telestream Cloud has a handy MP4 preset you can use. Simply head to your Telestream Cloud account and then edit one of your encoding clouds. At the bottom of the page you will see the ‘Add Profile’ button. Click this and choose 'MP4 (H.264)’ (use Hi if you would like extra good quality video), feel free the change the dimensions if desired.
Once you’ve setup this profile, you will want to use the generated encodings with the embed code example below.
To take advantage of true streaming you will need to use a Flash player. JW Player or Flowplayer are both great options.
The example shows embed using RTMP streaming with JW Player.
Before this will work, you will need to change some parameters.
file=filename the filename of the video in your S3 Bucket. Telestream Cloud saves files to your bucket with the following convention: $path$$extname$. Please check the API docs, Rails or PHP tutorials for more information about encodings.
streamer=value where value is the the streaming url: $domain_name$/cfx/st. You can find the Domain Name by logging into the Amazon CloudFront console.
Once you’ve set these parameters correctly you’ll have video being streamed to your users!
Widget
Telestream Cloud Web Widget
Telestream Cloud Web Widget allows you to easily monitor your cloud encoding activity and share this information on your website.
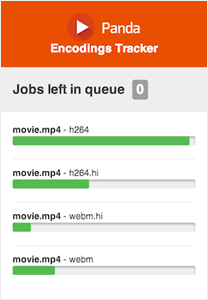
Data displayed includes original name of the uploaded file, encoding profile name, encoding progress and number of jobs left in encoding queue.
Configuration
To get the widget working, at first you need to enable it in your cloud settings. Once you set Enable Web Widget to Yes, you will be presented with a small code snippet.

Copy this code and pase it into your html body. Please also remember to click Save Changes at the bottom of the Cloud Settings page.
If at any time you decide that you no longer want Telestream Cloud to sent out widget data, change Enable Web Widget back to No.
Debugging
If you are having trouble with Telestream Cloud integration, those are a few things you can try out before getting in touch with support.
Debug pannel
We provide you with a debug panel for your application which is located in the web app. From here you can check the state of the uploading / encoding / notification processes.
Debug data is not persistent, make sure you have the debug window open in a different tab or window while testing the workflow.
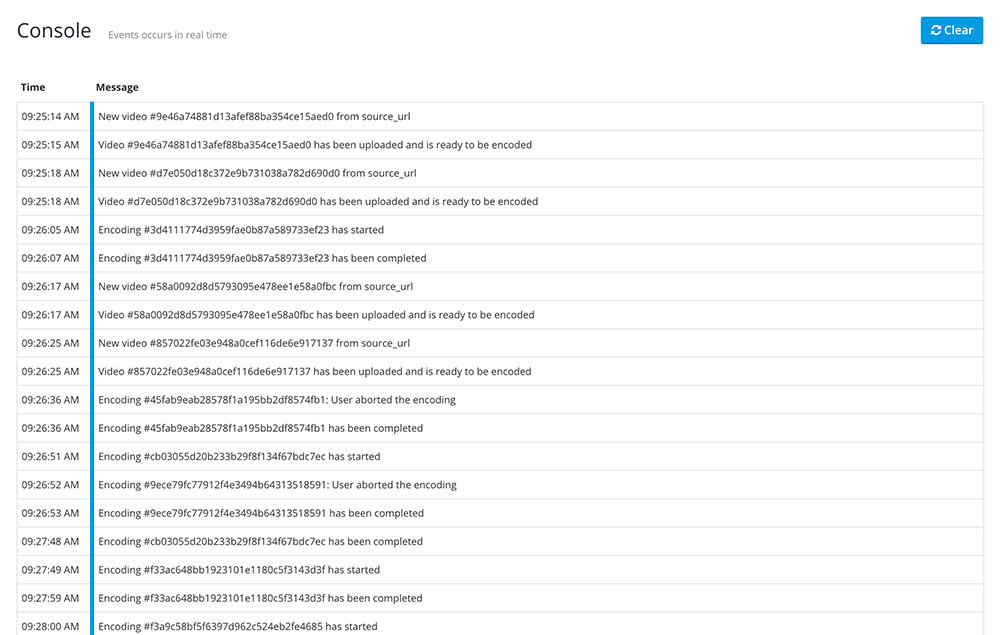
Turning on debugging in your JavaScript
Example
PandaUploader.log = function() {
  if (window.console && window.console.log) window.console.log(arguments);
};
To print the activity of the uploader, you can turn on debugging directly in your javascript console (webkit inspector or firebug). After loading the page, paste the example code.
This should create output like the following in your browser (Chrome in this example):
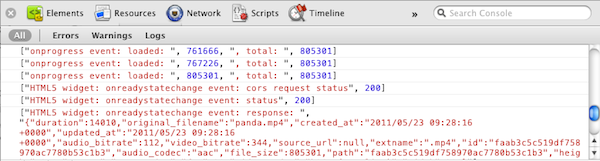
Debugging the encoding
There is a couple of reasons why an encoding can fail. To know more about it, use the api and check the error_message/error_class attribute of the video and encoding.
Also you will find a log file in your bucket which tells why the encoding has failed (ENCODING_ID.log).
FAQ
Please read the FAQ before getting in touch with support.
Where next?
If none of these techniques help get in touch with support and we’ll check whether there is a problem we can help you with.
Please make sure the problem hasn’t been already solved by the support team before creating a new ticket.
Please make sure you can provide us a way to find your account, as a Cloud ID or an Encoding ID.
Application integration
Rails
Integrating Telestream Cloud with Ruby on Rails
The following is a guide to integrating Telestream Cloud into your Ruby on Rails application. However the instructions here can easily be adapted to any Ruby-based web framework or web application.
If you want to use the Heroku addon then start with the Heroku add-on documentation.
Before continuing you must have a Panda account and have created an encoding cloud.
Free accounts are available, great for playing around.
Configuration
First you must log in to your account where you can find your credentials as follows:
- Under Api Access: Access key, Secret key, API URL
- After selecting your Cloud: Cloud ID
PRO TIP: you may want to create two different clouds, one for development and one for production. Note that each cloud will have a different Cloud ID, but the other credentials will be shared across all clouds.
development:
  access_key: Your Panda access key
  secret_key: Your Panda secret key
  cloud_id: Your Panda cloud id
  # Uncomment the line below if your panda account is in the EU
  # api_host: api-eu.pandastream.com
Once equipped with this information, you can create a Telestream Cloud config file on config/panda.yml. Just copy the example and fill it out with your own credentials where appropriate.
In your Gemfile, add the line gem 'panda', '~> 1.6.0'.
Now install the gem:
$ bundle
Panda.configure(YAML.load_file(Rails.root.join("config/panda.yml"))[Rails.env])
Next create the file initializers/panda.rb and then add the line below to connect to Telestream Cloud when your app starts. If you’re using the Panda Heroku Add-on you will need to set the PANDASTREAM_URL environment variable on your local system. Read the Panda Heroku Add-on docs for further details.
Playing with the library
>> Panda::Profile.all
=> [<Panda::Profile preset_name: h264, ...>]
Fire up a console. Your initialiser should run and connect you to Telestream Cloud. You should be able to list all your encoding profiles.
>> video = Panda::Video.create!(:source_url => "https://panda-test-harness-videos.s3.amazonaws.com/panda.mp4")
Now, upload a sample video. You can use any URL; this is the URL of a sample we’ve made available.
>> video = Panda::Video.create!(:file => File.new("/home/me/panda.mp4"))
Or use a local file.
>> video.reload.status
=> "success"
Now wait until the video has finished encoding (which could be several minutes). You can check by doing:
>> video.encodings['h264'].reload
>> video.encodings['h264'].encoding_progress
=> 100
>> video.encodings['h264'].status
=> "success"
Your input video has been uploaded to your storage.
>> video.encodings['h264'].url
=> "https://s3.amazonaws.com/S3_BUCKET/e40c1f68fbc1c4db46.mp4"
Now you can get the URL of a re-encoded version:
Open this URL in your browser, and you’ll see that Telestream Cloud has received, re-encoded, and stored your video into your S3 bucket.
Everything’s working great - time to write some application code! If you’d like to play more with the library some more, the full set of resources are listed in the API Documentation or Gem Docucmentation.
Implementing video uploads
The simplest way to begin uploading videos directly to Telestream Cloud is using our Resumable Javascript Uploader
Setup models and controllers
rails g model Video title:string panda_video_id:string
rake db:migrate
Create a Video model to save the ID of the video from Telestream Cloud, we’ll call it panda_video_id:
#app/models/video.rb
class Video < ActiveRecord::Base
  attr_accessible :panda_video_id, :title
  validates_presence_of :panda_video_id

  def panda_video
    @panda_video ||= Panda::Video.find(panda_video_id)
  end
end
Telestream Cloud provides its own Panda::Video model, which we’ll wrap with our ActiveRecord model.
Edit app/models/video.rb.
# app/controllers/videos_controller.rb
class VideosController < ApplicationController
  def show
    @video = Video.find(params[:id])
    @original_video = @video.panda_video
    @h264_encoding = @original_video.encodings["h264"]
  end

  def new
    @video = Video.new
  end

  def create
    @video = Video.create!(params[:video])
    redirect_to :action => :show, :id => @video.id
  end
end
Now you can access the wrapped object with myvideo.panda_video, or go directly to the encodings with myvideo.panda_video.encodings. This call requires a call to the Telestream Cloud API, so we cache it with an instance variable to save time.
We’ll use a simple VideosController following the REST pattern.
Create app/controllers/videos_controller.rb.
In the show action, we’re first getting a reference to our ActiveRecord object, as normal. Then we’re getting a reference to the wrapped Panda::Video, as @original_video.
Finally, we’re getting a reference to the actual encoding of the video that’s been performed by Telestream Cloud, so that we can pass it to the View. When a video is uploaded, one Encoding will be created for each Profile that’s defined. A shiny-new Telestream Cloud account comes with a single Profile created, named h264, but you can create more in your account.
Create the video upload form
<script src="//cdn.pandastream.com/u/2.3/panda-uploader.min.js"></script>
Create the layout /app/views/layouts/application.html.erb, and include the uploader javascript library:
<%= form_for @video do |f| %>

  <!-- field where the video ID will be stored after the upload -->
  <input type="hidden" name="panda_video_id"/>

  <label>Title</label>
  <input type="text" name='video[title]' placeholder="Give a title">

  <!-- upload progress bar (optional) -->
  <div class='progress'><span id="progress-bar" class='bar'></span></div>

  <!-- file selector -->
  <div id="browse">Choose file</div>

<% end %>
<script>
  var upl = panda.uploader.init({
    'buttonId': 'browse',
    'progressBarId': 'progress-bar',
    'onQueue': function(files) {
      $.each(files, function(i, file) {
        upl.setPayload(file, {'csrf': "<%= form_authenticity_token %>"});
      })
    },
    'onSuccess': function(file, data) {
      $("#panda_video_id").val(data.id)
    },
    'onComplete': function(){
      $("#new_video").submit();
    }
  });
</script>
Now create a view which will be the video upload form: /app/views/videos/new.html.erb.
Create an upload session
# app/controllers/panda_controller.rb
class PandaController < ApplicationController

  # override rails' default csrf check to use the json encoded payload instead of params
  def verify_authenticity_token
    handle_unverified_request unless (form_authenticity_token == upload_payload['csrf'])
  end

  def upload_payload
    @upload_payload ||= JSON.parse(params['payload'])
  end

  def authorize_upload
    upload = Panda.post('/videos/upload.json', {
      file_name: upload_payload['filename'],
      file_size: upload_payload['filesize'],
      profiles: "h264",
    })

    render :json => {:upload_url => upload['location']}
  end
end
Before you can upload a video you’ll need to authenticate and reserve an upload url for each file.
The authentication process of your new upload occurs via an HTTP request to a configurable authentication url when the file is ready to be uploaded. The HTTP request is executed via AJAX POST request. The destination of the authentication request can be configured by setting the authorizeUrl.
The default route is /panda/authorize_upload.
Set up routes
match "/panda/authorize_upload", :to => "panda#authorize_upload"
resources :videos
root :to => "videos#new"
Finally, update your routes in config/routes.rb.
Basic view
<h2><%= @video.title %></h2>
<p><%= h @video.panda_video.inspect %></p>
Now create a basic view to show the video data once it has been uploaded. Edit /app/views/videos/show.html.erb:
Test video uploading
Start your Rails application with rails s and visit http://localhost:3000/videos/new where you will see the video upload form. Choose a video (download this splendid video of a sneezing panda if you need a test one) and hit submit. The video will be uploaded directly to Telestream Cloud, and once complete the form will be submitted to your Rails app, with the upload’s panda_video_id included.
You should now be looking at /videos/1, which will show the detail of the video object. The status should be “processing”. Refresh this page and you will see it change to “success” when the video has finished encoding.
Create a player page
<% if @video.panda.status == "success" %>
  <video id="movie" width="<%= @h264_encoding.width %>" height="<%= @h264_encoding.height %>" preload="none"
    poster="<%= @h264_encoding.screenshots.first %>" controls>
    <source src="<%= @h264_encoding.url %>" type="video/mp4">
  </video>
<% end %>
There are a few options for video playback. Read the Video Players documentation for detailed information. The example below should be enough to get you started though using Html5.
If you don’t have to support older browsers, the simplest is to use the new HTML5 <video> tag. To support Firefox you’ll also need to add in an OGG source.
Edit your show page in /app/views/videos/show.html.erb.
If you refresh the show page you’ll see the encoded video!
Advanced topics
Encoding Profiles
upload = Panda.post('/videos/upload.json', {
  file_name: upload_payload['filename'],
  file_size: upload_payload['filesize'],
  profiles: "profile1, profile2",
})
You can change the formats that Telestream Cloud encodes videos into by logging in to your Panda account. Each Cloud has its own set of Profiles. To learn more, see the sections on Encoding Profiles.
It’s possible to define several profiles and then decide on a per-video basis which ones to use. You can specify the list of profiles you would like your video to be encoded with while creating your upload session.
Learn more
Now that you have a basic implementation, you might want to check out the Ruby on Rails examples, Panda Gem Documentation or the full API Documentation for more ideas.
Feedback
Whether you feel that this article is incorrect, outdated or missing information, don’t hesitate to contact the support.
PHP
Integrating Telestream Cloud with your PHP application
The following is a guide to integrating Telestream Cloud into your PHP application.
Before continuing you must have a Telestream Cloud account. If you haven’t got one yet, you can sign up here. Free accounts are available, great for playing around.
The easiest way to integrate Telestream Cloud into your application is by using the open source libraries that we provide. On this example, our PHP API library, panda_client_php.
Configuration
First you must log in to your account, where you can find your credentials as follows:
If you haven’t yet created an encoding cloud you should do so before continuing.
PRO TIP: you may want to create two different clouds, one for development and one for production. Note that each cloud will have a different Cloud ID, but the other credentials will be shared across all clouds.
<?php
$panda = new Panda(array(
    'cloud_id'   => 'my-cloud-id',
    'access_key' => 'my-access-key',
    'secret_key' => 'my-secret-key',
    'api_host'   => 'api.pandastream.com',
    // Use api-eu.pandastream.com if your panda account is in the EU
));
?>
Once equipped with this information, you can create a Telestream Cloud client using the PHP library:
This will give you a $panda object that you can use to interact with Telestream Cloud. For more info, see the documentation of the library on GitHub.
Playing with the library
<?php
$profiles = json_decode($panda->get('/profiles.json'));
echo "<p>Profiles :</p>\n";
print_r($profiles);
?>
Let’s write a simple script that uses the above configuration. Copy the following after the initialisation code: You should be able to list all your encoding profiles.
The code should print out an array containing your list of profiles. That means everything is working correctly so far.
<?php
$video = json_decode($panda->post('/videos.json', array(
'source_url' => 'https://panda-test-harness-videos.s3.amazonaws.com/panda.mp4'
)));
echo "<p>Video :</p>\n";
print_r($video);
?>
Now, upload a sample video. You can use any URL; this is the URL of a sample we’ve made available:
<?php
$encodings = json_decode($panda->get('/videos/' . $video->id . '/encodings.json'));
echo "<p>Encodings :</p>\n";
print_r($encodings);
?>
Wait until the video has finished encoding (which could be several minutes). You can check the status by doing:
Everything’s working great - time to write some application code! If you’d like to play more with the library some more, the full set of resources are listed in the API Documentation or the PHP client.
Implementing video uploads
The simplest way to begin uploading videos directly to Telestream Cloud is using our Resumable Javascript Uploader
Create an upload page
<form action="/player.php" id="new_video">
<!-- field where the video ID will be stored after the upload -->
<input type="hidden" name="panda_video_id"/>
<!-- upload progress bar (optional) -->
<div class='progress'><span id="progress-bar" class='bar'></span></div>
<!-- file selector -->
<div id="browse">Choose file</div>
</form>
<script>
panda.uploader.init({
'buttonId': 'browse',
'progressBarId': 'progress-bar',
'authorizeUrl': "authorize_upload.php",
'onSuccess': function(file, data) {
$("#panda_video_id").val(data.id)
},
'onComplete': function(){
$("#new_video").submit();
}
});
</script>
Somewhere in your application you can create the form where the upload will take place. Copy the following code into your PHP page:
<script src="//cdn.pandastream.com/u/2.3/panda-uploader.min.js"></script>
Additionally, you need to include the uploader library:
The code assumes after posting the form, you’ll go to the page /player.php
When the upload is success, we fill out the hidden field panda_video_id and submit the form to the player.php page so you can process those information.
Create an upload session
<?php
// authorize_upload.php
include('panda.php');
include('config.inc.php');
$payload = json_decode($_POST['payload']);
$filename = $payload->filename;
$filesize = $payload->filesize;
$upload = json_decode(@$panda->post("/videos/upload.json",
array('file_name' => $filename, 'file_size' => $filesize, 'profiles' => 'h264')));
$response = array('upload_url' => $upload->location);
header('Content-Type: application/json');
echo json_encode($response);
?>
Before you can upload a video you’ll need to authenticate and reserve an upload url for each file.
The authentication process of your new upload occurs via an HTTP Request to a configurable authentication url when the file is ready to be uploaded. The HTTP Request is executed via AJAX POST request. The destination of the authentication request can be configured by setting the authorizeUrl.
Create a player page
<?php
$video_id = $_GET['panda_video_id']; // Coming from the previous form
$all_encodings = json_decode(@$panda->get("/videos/$video_id/encodings.json"));
$vid = $all_encodings[0];
$vid->url = "http://YOUR-S3-BUCKET-NAME.s3.amazonaws.com/{$vid->path}{$vid->extname}";
?>
<div>
<video id="movie" width="<?php echo $vid->width ?>" height="<?php echo $vid->height ?>" preload="none" controls>
<source src="<?php echo $vid->url ?>" type="video/mp4">
</video>
</div>
There are a few options for video playback. Read the Video Players documentation for detailed information. The example below should be enough to get you started though using Html5.
If you don’t have to support older browsers, the simplest is to use the new HTML5 <video> tag. To support Firefox you’ll also need to add in an OGG source.
That simple. This code assumes that you come from the form described above, and the ID of the video will therefore be in the $_GET variable, set by the form.
Note that you’ll also have to put the name of your S3 bucket in place of the YOUR-S3-BUCKET-NAME text, so the URL to the encoded video can be correctly constructed.
If you refresh the show page you’ll see the encoded video!
Advanced topics
Encoding Profiles
<?php
$upload = json_decode(@$panda->post("/videos/upload.json",
array('file_name' => $filename, 'file_size' => $filesize, 'profiles' => 'profile1, profile2')));
?>
You can change the formats that Telestream Cloud encodes videos into by logging in to your Panda account. Each Cloud has its own set of Profiles. To learn more, see the sections on Encoding Profiles.
It’s possible to define several profiles and then decide on a per-video basis which ones to use. You can specify the list of profiles you would like your video to be encoded with while creating your upload session.
Learn more
Now that you have a basic implementation, you might want to check out the PHP examples, the PHP client and the API documentation
Feedback
Whether you feel that this article is incorrect, outdated or missing information, don’t hesitate to contact the support.
Frequently Asked Questions
Videos
Flash is crashing before or after selecting a file.
Please can you check first if it crashes also with swfupload examples (http://demo.swfupload.org/v220/simpledemo/index.php).
If it does not work get in touch with support.
Video resource has status fail. What does this mean?
The status attribute of a video resource is the result of the following process:
- Getting your original video from the source.
- No encoding task has been performed yet.
A failure can be the result of following problems:
- You are using the source_url with a free sandbox account and the video is bigger than 10MB. Send a smaller video or upgrade your account.
- You are using the source_url and the video is not reachable by Telestream Cloud. Make sure your video can be downloaded from outside and that you are not referring to localhost.
Check attributes error_class and error_message of the response
All my recent uploads are failing now. What’s happening?
You should first check that Telestream Cloud has still permissions to read and write files to your bucket, using Amazon S3 console. You can grant access to Telestream Cloud again by editing your cloud in the web app.
If yes, please get in touch with the support.
If not, use the edit cloud link inside your account, re-type your bucket name and re-enter your amazon credentials.
I can’t find the encoding log file in my bucket
Check first the status of your video by doing GET /videos/:id.json. If the status is fail then look at the “Video Resource has status fail” section
Telestream Cloud uploads temporary files in my bucket. How can I avoid that?
Telestream Cloud will upload all files having a filename starting with the Encoding ID. So make sure you give to your temporary file a name which doesn’t start with $record_id$.
Can I use a different video container?
When you create a profile from a preset, we choose a default container compatible with the video codec. Generally speaking this will suffice for most peoples needs.
If you do want to change container, you can simply update the extname of your profile:
profile = Panda::Profile.create!(
:name => 'h264',
:extname => '.mkv',
)
How do I encode and store my videos in the EU region?
This is handled through your Telestream Cloud account creation and Amazon’s AWS region selection.
When creating a Telestream Cloud account you can opt to have the service based in Amazon’s EU region (please contact us if you wish to move an existing account to the EU region). This will mean that all your videos are uploaded and encoded on our EU servers.
If you are using this option you will also need to make sure the S3 buckets which store you videos are also in the EU region.
Opting for the EU service will increase your monthly bill by just over 10% due to the increased cost of Amazon’s EU servers.
What storage backends can I use?
We’re constantly working on adding new storage options.
Currently Telestream Cloud supports following:
- Amazon S3
- Google Cloud Storage
- Rackspace Cloud Files
- your own FTP server
If you have valid accounts with any of these service providers you can connect them right away. Or set up your FTP server for full control.
Does Telestream Cloud support resumable uploads?
Yes, file uploader built into Telestream Cloud web UI supports resumable upload. Anytime connection gets broken while you upload a file to Telestream Cloud it will be resumed once it’s restored. No need to upload file again. Please note that resumable upload will not work with Flash version of uploader which is fallback option.
Encodings
Does Telestream Cloud support audio encoding?
Yes, we provide several audio presets or you can check the Advanced profiles section and create your own profiles.
Does Telestream Cloud support multi-pass encoding?
Yes, 2 pass encoding is supported for presets and custom profiles.
I’m using a custom profile and my videos are not scaled
Make sure that your command include the $filters$ variable
Encoding has status fail. What does that mean?
If you have a failing encoding, make sure: * the original video is reachable. * the profile the encoding is using still exists
Check attributes error_class and error_message of the response
If the steps above are correct, then you should check the log file uploaded to your s3 bucket and see why the command has failed.
If you think your video should have been encoded correctly, please get in touch with support and give us the ID of this encoding.
How can I create Audio Encodings?
Telestream Cloud allows you to convert your audio files or video file into a new audio encoding. We provide some simple to use presets such as MP3, AAC or Ogg Vorbis. Creating an audio encoding profile using the Telestream Cloud Ruby Gem would look like this:
profile = Panda::Profile.create!(
:name => 'aac',
:extname => '.m4a',
)
How can I adjust the speed of my video?
If you want to speed up or slow down your video (perhaps you are doing a Benny Hill'esque chase scene?) you can create a custom profile with an ffmpeg command value similar to this:
ffmpeg -i $input_file$ -vf "setpts=(1/<speed>)*PTS" $output_file$
Where speed is the desired speed of the video. Setting it to 1 would be the normal speed, 2 would be double speed, etc. A complete command using the Telestream Cloud Ruby Gem might look like this:
profile = Panda::Profile.create!(
:name => 'DoubleTime',
:extname => '.mp4',
:command => 'ffmpeg -i $input_file$ -vf "setpts=(1/2)*PTS" $output_file$',
:title => 'DoubeTime'
)
Now, all of your videos will be encoded with a new double speed version.
How can I create a new encoding to an existing video?
If you want to add another profile and re-encode an existing video, this is the way to do it:
new_profile_name='xxx'
video_id= 'xxxx'
video=Panda::Video.find video_id
puts "Adding one encoding to #{video.original_filename} using #{new_profile_name}..."
video.encodings.create!(:profile_name => new_profile_name)
What are Telestream Clouds’ Supported Video Formats?
Telestream Cloud supports encoding a wide variety of video formats. Some of the more popular video formats that we support are:
- Input: AAC, AVI, 3GP, FLV, MOV, MP3, MP4, MPEG, OGG, WAV, WEBM, WMA, WMV and many more.
- Output: AAC, AVI, FLV, MP3, MP4 (H.264), OGG, WEBM (VP8) any more output formats including iPhone segmented streaming are also supported.
A complete list of all supported video formats is avaiable here.
How can I remove the black bars around my videos?
If you see black bars around your videos it’s most likely because your profile’s aspect_mode is set to ‘letterbox’.
You can fix this by adjusting your profile. Just update the aspect_mode setting to 'constrain’ and say bye-bye to those pesky black bars.
Can I use a different notification url
If you are integrating panda into your webapp with WebHooks enabled, you might want to have a different notification url for your Development, Staging and Production setup.
The best solution is to create a different Telestream Cloud cloud for each environment and set a different notification url.
Separating your environments with a different cloud is a Telestream Cloud best practice. It avoids any accidental operations on data in the wrong environment.
Errors
I’m getting an error code 404. What does this mean?
404 means Resource not found. You are trying to access to a resource which doesn’t exist. It can be a video, and encoding, a profile, a preset or trying to connect with a wrong Cloud ID.
If you are posting a video, make sure you are not specifying a wrong profile Id
I’m getting an error code 417. What does this mean?
It means you are maybe using the flash uploader behind a proxy server.
I’m getting an error code 413. What does this mean?
It means you have reached the upload file size limit. If you are on free subscription, make sure you choose a file which doesn’t exceed 10MB or upgrade your account to remove this limit.
I’m getting an error code 401. What does this mean?
It means you sent a Bad request. At least one required parameters is missing. Check The API section and look at the required parameters. This is likely to be caused by the signature not being generated correctly.
I’m getting an error code 401 and I have an EU account using panda uploader. What does that mean?
EU and US use difference hosts. You should specify api_host : "api-eu.pandastream.com".
Check the panda_uploader’s Documentation
Various
Telestream Cloud gem returns a Hash instead of a JSON string like before
Since Telestream Cloud 0.6 the default returned value is a Hash but it’s possible to get a JSON string back.
Check the panda_gem’s README file in http://github.com/pandastream/panda_gem
How can I restrict content to certain users?
Telestream Cloud uses Cloudfront to deliver content. As such, you can take advantage of Cloudfront’s access control measures to limit which users see your videos. To use this feature you should set your bucket to private, and then follow the instructions in the Amazon Documention to setup CloudFront to best suit your needs:
How can i play my videos in a private cloud?
If you have set your panda cloud to private, all your file will be uploaded to your s3 bucket with private access only:
(headers['x-amz-acl'] = 'private' )
That means that only you (s3 bucket owner) can generate a signed url, with your AWS Key/Secret pair, that temporarily grant access to your users for a certain amount of time. As this feature is not a Telestream Cloud but an S3 specific feature, we let you generate those Signed URL using the framework of your choice.
Using the Telestream Cloud Ruby Gem would look like this:
require 'fog'
require 'panda'
# create a connection
connection = Fog::Storage.new({
:provider => 'AWS',
:aws_secret_access_key => YOUR_SECRET_ACCESS_KEY,
:aws_access_key_id => YOUR_SECRET_ACCESS_KEY_ID
})
# Get infos from panda
bucket = Panda.cloud.s3_videos_bucket
video = Panda::Video.find("your video id")
# Finally, get the signed url
expires_at = Time.now + (5 * 60)
signed_url = connection.directories.get(bucket).files.get_https_url(video_path, expires_at)
Why am I not receiving any WebHooks anymore?
If you don’t receive any webhooks, go the the Debug page in your dashboard and see in realtime your notification activity.
You should see either a green or red log entry giving you more details about what is going on. Your controller might be failing or some authentication (Basic auth) might prevent your application to receive the notifications.
Can I transfer ownership to my own AWS account?
Amazon S3 doesn’t allow an account to change the ownership of a file.
If you want to change the owner inside your S3 Object ACL, the solution is the make a COPY of your files using your own AWS account. It is described here.
Can I switch to a different encoding provider?
For now you can use either AWS or Google Compute to encode your videos. You can switch between then AWS US, AWS EU and Google US.
When changing encoding provider you should be aware of couple things: * you are basically creating a new account with the same credentials but with a new subscription - by default free Sandbox subscription * encoding clouds and profiles created for one provider will not be visible for other * API access identifiers will be different for each provider Of course all your encodings are safe when you jump between providers and will be there when you switch back to the one used previously.
Where is my Telestream Cloud Invoice?
When you sign up with Telestream Cloud, you should receive an email invoice at the email address you registered with. Always make sure to check your Spam / Junk email folders to make sure that your invoice hasn’t gone astray and wandered in there!
If, for some reason, your invoice appears to have completely disappeared on you, please open a support ticket and we will re-send the invoice(s) that you need.
How can I restrict content to certain users?
Telestream Cloud uses Cloudfront to deliver content. As such, you can take advantage of Cloudfront’s access control measures to limit which users see your videos.
To use this feature you should set your bucket to private, and then follow the instructions in the Amazon Documention to setup CloudFront to best suit your needs:
Can I stream MP4 by moving the MOOV atom?
If you are using our presets, we automatically move the MOOV atom to the beginning of your video files. This ensures your videos playback starts fast.
If you are using custom commands, you will need to apply qt-faststart on your files.
Using the Ruby gem:
Panda::Profile.create!({
:stack => "corepack-2",
:name => "h264.SD",
:width => 480,
:height => 320,
:command => "ffmpeg -i $input_file$ -threads 0 -c:a libfaac -c:v libx264 -preset medium $video_quality$ $audio_bitrate$ $audio_sample_rate$ $keyframes$ $fps$ -y video_tmp_noqt.mp4\nqt-faststart video_tmp_noqt.mp4 $output_file$"
})
Note that we are first saving the video to a file named video_tmp_noqt.mp4. Then qt-faststart is run using the tmp video as input and outputting to your desired output_file.